


Most first-time gardeners abandon their plots within a season—not from lack of effort, but from missing a proven starting point. Before breaking ground, check your USDA Plant Hardiness Zone Map to ensure your first plants match local climate realities. Whether you’re working with a sprawling backyard or a tight balcony, DecoradHouse Garden Tips delivers a step-by-step roadmap to build a resilient, low-maintenance landscape from day one.
We’ve pulled together proven strategies that walk you through planning, planting, and keeping your garden vibrant—because you don’t need a green thumb to grow something beautiful.
1. Understanding Your Garden Canvas
Before you plant a single seed, think of your garden as a blank canvas. Understanding its sunlight, soil, and drainage sets the stage for success.
- Map Sunlight: Track how many hours of direct sun each area gets (full sun: 6+ hours; partial shade: 3–6 hours). Use a notebook or garden planning app like Planter or Gardenize to log patterns over a week.
- Test Soil Drainage: Dig a 12-inch hole, fill it with water, and time how long it takes to drain. Fast (under 1 hour) means sandy soil; slow (over 4 hours) suggests clay.
- Check Slope and Microclimates: Note low spots where water pools or windy corners that dry out plants. These dictate plant choices and layout.
Try This: Create a simple garden map on graph paper, marking sunny/shady zones and wet/dry areas.
2. Building Healthy Soil Foundations
Skip the seasonal guesswork: investing in soil biology upfront cuts your future troubleshooting by half. Get this right upfront, and you’ll spend less time battling pests or rescuing wilting plants later.
- Test Your Soil: Send a sample to a local lab to check pH (ideal: 6.0–7.0) and nutrient levels. Soil pH — a measure of acidity or alkalinity on a 0–14 scale — affects how well roots absorb nutrients. A pH between 6.0 and 7.0 keeps nitrogen, phosphorus, and potassium available at the root level, where plants need them most. Most labs provide amendment recommendations.
- Amend with Organic Matter: Mix in 5–10% compost or aged manure annually to boost fertility and improve texture. For example, 1 inch of compost over a 10-square-foot bed is about 3 cubic feet. Boost your compost’s effectiveness by inoculating with mycorrhizal fungi—these beneficial organisms form symbiotic relationships with plant roots, increasing water and nutrient absorption by up to 10x.
- Mulch for Protection: Apply 2–3 inches of wood chips or straw to retain moisture, suppress weeds, and regulate soil temperature.
Pro Tip: Your local USDA Cooperative Extension office offers free or low-cost soil test kits—visit their website to request one before amending your soil.
3. Mastering Water Management
Keep your plants thriving and your utility costs predictable by switching from blanket sprinkling to targeted root hydration.
- Hand Watering: Precise and low-cost, but time-intensive—best for containers and small spaces.
- Drip Irrigation: Efficient and automatable; higher upfront cost but ideal for large beds or busy schedules. Look for EPA WaterSense-labeled drip emitters to maximize efficiency.
- Rain Barrels: Eco-friendly supplemental source; pair with a diverter kit for easy setup.
- Sprinkler Systems: Wide coverage but higher evaporation risk; use with timers for efficiency.
- Water Deeply, Less Often: Aim for 1–2 inches per week, delivered in one or two sessions to encourage deep roots.
- Time It Right: Water early morning (5–8 AM) to minimize evaporation and prevent fungal growth. Keep foliage dry and let your soil moisture dictate frequency—never guess. Use a calibrated soil moisture sensor at the root zone to verify readings before turning on irrigation, eliminating overwatering and root rot risks.
- Use Mulch: A 2-inch mulch layer cuts water loss by up to 20% and keeps roots cool.
Pro Tip: Check your soil’s moisture by digging 2 inches down—if it’s dry, water; if damp, wait.
4. Plant Selection & Design Principles
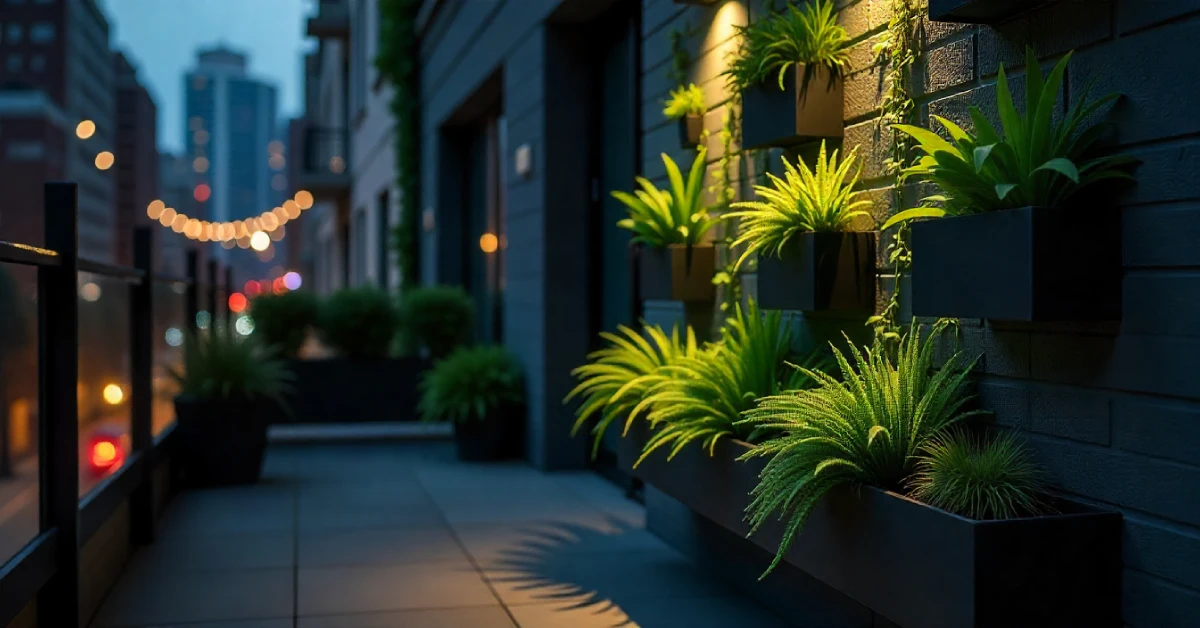
Choose the right plants and design with intention, and your garden becomes more than pretty—it supports local wildlife and thrives with less work.
- Choose Drought-Tolerant Perennials: Plants like coneflower, catmint, or bee balm thrive with minimal water. Example: Coneflowers bloom all summer with just 1 inch of water weekly.
- Prioritize Native Species: Native plants adapted to your USDA Hardiness Zone (e.g., milkweed for pollinators in Zones 3-9) support wildlife while requiring minimal irrigation. Check your region’s native plant society for lists.
- Inspect Root Flare at Planting: When placing shrubs or perennials in the ground, perform a quick root flare inspection to ensure the widest part of the trunk sits exactly at soil level. Planting too deeply suffocates roots and guarantees early decline.
- Design with Repetition: Cluster 3–5 of the same plant for visual impact. Alternate heights and textures (e.g., tall grasses with low groundcovers) for depth.
Pro Tip: Use the “rule of thirds” in garden design—divide your space into thirds and place focal plants off-center for balance.
5. Sustainable & Eco-Friendly Practices
Swapping one sprinkler session for a drip line, or adding a 50-gallon rain barrel, can cut mains water use by up to 20%—without changing how your garden looks or performs.
- Harvest Rainwater: A 50-gallon barrel can collect 300 gallons per year in an average climate, cutting mains water use by 20%.
- Go Peat-Free: Swap peat for coir or composted bark to protect carbon-storing peatlands. Example: Coir retains water 30% better than peat. By applying core Xeriscaping Principles—like grouping plants by water needs and prioritizing permeable ground cover—you’ll cut outdoor irrigation by up to 50% without sacrificing visual impact.
- Compost at Home: Turn kitchen scraps (vegetable peels, coffee grounds) and yard waste into nutrient-rich compost. Aim for a 3:1 ratio of brown (leaves) to green (grass clippings). Speed up decomposition with a compost tumbler that follows a strict 3-day aeration cycle, keeping internal temperatures between 130–150°F to accelerate breakdown and eliminate odor before pathogens or pests arrive—or opt for a static bin if you prefer low-maintenance, passive composting.
Pro Tip: A rain garden is a shallow, planted depression designed to absorb runoff from roofs or driveways. Plant one in low spots using deep-rooted natives to filter pollutants before water reaches groundwater — and it requires almost no maintenance once established.
6. Pest & Disease Management
Every garden gets pests — the difference is whether you react with a chemical spray or with a plan. Integrated Pest Management (IPM) is a research-backed approach that starts with prevention, prioritizes biological controls, and uses targeted treatments only when necessary.
Start with prevention: Pair marigolds near tomatoes to naturally repel aphids and root nematodes. If pests appear, deploy biological controls like Bti for mosquitoes or introduce predatory mites before considering sprays. Only apply targeted treatments when you cross your IPM Action Threshold—the point where pest numbers actually threaten crop viability. For visible leaf yellowing or wilting, prune affected stems immediately to restore airflow and halt disease spread.
Pro Tip: Introduce beneficial insects like ladybugs by planting dill or fennel.
7. Creative Solutions for Small Spaces
A fire escape, a fence, or a three-foot balcony rail can support more plants than most people expect — if you build up instead of out.
- Vertical Gardening: Use wall-mounted planters or trellises for climbing plants like ivy or peas. A 4×4-foot trellis can support 10 plants.
- Container Gardening: Mix pots of varying sizes (e.g., 12-inch ceramic for herbs, 24-inch for shrubs) for flexibility and visual interest.
- Keyhole Gardens: A design developed for water-scarce environments, keyhole gardens place a composting basket at the center of a circular raised bed — feeding the soil from the inside out while keeping every plant within arm’s reach. Ideal for vegetables in 6-foot diameters.
- Square Foot Gardening: For maximum yield in minimal space, divide your raised bed into 1×1-foot sections and plant intensively—4 lettuce plants per square, 1 tomato per square.
Pro Tip: Repurpose old baskets as planters for a rustic, budget-friendly look.
8. Seasonal Garden Maintenance Calendar
A month-by-month schedule ensures your garden stays healthy and vibrant.
| Month | Tasks |
|---|---|
| Spring | Clear debris, test soil, add compost, plant perennials, and prune shrubs. |
| Summer | Water deeply, mulch beds, deadhead flowers, and monitor pests. |
| Fall | Plant bulbs, divide perennials, rake leaves, and add winter mulch. |
| Winter | Protect plants with frost cloth, prune dormant trees, and plan for spring. |
Pro Tip: Keep a garden journal to track what works each season.
Conclusion
Your garden won’t thrive by matching magazine photos; it thrives when your schedule matches its seasonal rhythm. With DecoradHouse Garden Tips and the right soil, smart watering habits, and a seasonal routine, it gets better every year — and so does your confidence as a gardener. Whatever you’re working with — a shaded corner, a rented balcony, or a neglected backyard — there’s a version of this that works for you.
Skip the trial-and-error phase. Grab our free first-season planting checklist to lock in zone-specific sowing dates, monthly maintenance reminders, and soil prep steps delivered straight to your inbox. Sync your workflow with a digital seasonal planting calendar that auto-updates based on your local frost dates.
