


When winter’s icy grip tightens, your home’s plumbing can face serious challenges. A burst pipe is one of the most dreaded winter woes, capable of causing extensive damage if not addressed promptly.
This guide will walk you through the process of fixing a burst pipe in winter, from identifying the problem to implementing a solution and preventing future issues.
What Causes Pipes to Burst in Winter?
Winter’s freezing temperatures are the main culprit behind burst pipes. As water inside the pipes freezes, it expands, creating immense pressure that can cause the pipe to rupture. This often happens in unheated areas of homes or when temperatures plummet unexpectedly.
Think of it like this: imagine filling a water bottle to the brim and putting it in the freezer. As the water turns to ice, it expands and can crack or burst the bottle. The same principle applies to your pipes but with potentially more disastrous consequences.
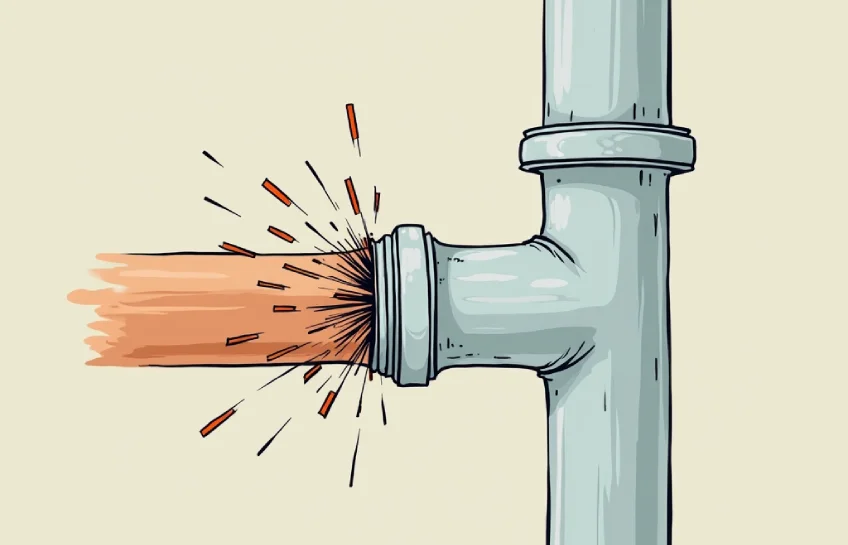
How to Identify a Burst Pipe
Spotting a burst pipe early can save you from a world of trouble. Here are some telltale signs to watch out for:
- Unusual sounds: If you hear water dripping or rushing when no taps are on, it’s time to investigate.
- Visible water damage: Puddles, and water stains on walls, floors, or ceilings are red flags.
- Reduced water pressure: A sudden drop in water pressure could indicate a leak.
- Unexplained increase in water bills: If your water usage spikes without reason, a hidden leak might be the cause.
What Should You Do Immediately After Discovering a Burst Pipe?
When you spot a burst pipe, quick action is crucial. Here’s what to do right away:
- Shut off the main water supply: This stops more water from flowing into the damaged pipe.
- Turn off electricity in affected areas: If water is near electrical outlets or appliances, cut the power to prevent electrical hazards.
- Open faucets: This helps drain the remaining water from the pipes and relieves pressure.
- Start removing standing water: Use towels, mops, or a wet vacuum to minimize water damage.
Remember, these steps are just first aid for your plumbing. The real work of fixing the burst pipe comes next.
Step-by-Step Guide to Fixing a Burst Pipe
Step 1: Locate the Burst
First things first, you need to find where the pipe has burst. This might be obvious if you can see water gushing out, but sometimes it’s trickier. Look for signs of water damage or feel along the pipe for any cracks or splits. Don’t forget to check less visible areas like crawl spaces or behind walls.
Step 2: Gather Necessary Tools and Materials
Before you start the repair, make sure you have everything you need. Here’s your shopping list:
- Pipe cutter
- Replacement pipe (match the material and size of the existing pipe)
- Pipe repair coupling
- Wrench
- Emery cloth
- Bucket (to catch any remaining water)
Having these tools ready will make the repair process smoother and quicker.
Step 3: Cut Out the Damaged Section
Now it’s time to get your hands dirty. Use the pipe cutter to remove the damaged portion of the pipe. Make clean, straight cuts on both sides of the burst. If you’re dealing with copper pipes, you might need a hacksaw instead of a pipe cutter.
Step 4: Prepare the Pipe Ends
After cutting, the pipe ends might be a bit rough. Use the emery cloth to smooth them out. This step is crucial for ensuring a tight, leak-free connection later on. Think of it like sanding a piece of wood before painting – smooth surfaces make for better results.
Step 5: Install the Repair Coupling
Now comes the part where you fix the pipe. Slide the repair coupling onto one end of the pipe, then connect it to the other end. Make sure it covers the entire smooth surface on both sides. The coupling acts like a bridge, joining the two sections of pipe together.
Step 6: Tighten and Secure
Using your wrench, tighten the coupling to create a watertight seal. But be careful – overtightening can damage the pipes or the coupling itself. It’s like tightening the lid on a jar – you want it secure, but not so tight that you can’t open it again.
Step 7: Test the Repair
The moment of truth! Turn the water supply back on and check for any leaks around the repaired area. If you notice any water seeping out, you might need to tighten the coupling a bit more or reassess your repair.
When Should You Call a Professional Plumber?
While DIY repairs can save money, sometimes it’s best to call in the pros. Consider reaching out to a professional plumber if:
- You’re unsure about any step in the repair process
- The burst pipe is in a hard-to-reach location
- There’s extensive water damage
- You don’t have the necessary tools or skills
Remember, a botched DIY job could end up costing more in the long run. When in doubt, it’s better to be safe than sorry.
How to Prevent Pipes from Freezing in the Future
An ounce of prevention is worth a pound of cure, especially when it comes to plumbing. Here are some tips to keep your pipes from freezing:
- Insulate pipes in unheated areas: Wrap pipes in basements, attics, and crawl spaces with insulation sleeves.
- Keep your home heated: Even when you’re away, maintain a temperature of at least 55°F (13°C).
- Let faucets drip: During extremely cold weather, allowing faucets to drip slightly can prevent pressure buildup.
- Seal leaks: Fix any cracks or holes that allow cold air to enter near pipes.
By taking these precautions, you can save yourself the headache of dealing with burst pipes in the future.
Conclusion
Fixing a burst pipe in winter isn’t a task for the faint of heart, but with the right tools and knowledge, it’s doable. Remember, quick action is key to minimizing damage. By following this step-by-step guide, you can tackle the problem head-on and restore your plumbing to working order.
But don’t forget – prevention is always better than cure. Take steps to protect your pipes before winter hits, and you might never have to deal with a burst pipe at all. And if you’re ever in doubt, don’t hesitate to call a professional plumber. After all, when it comes to your home’s plumbing, it’s better to be safe than sorry.
Stay warm, stay dry, and keep those pipes flowing!