


Spring is a great time to give your home a thorough cleaning from top to bottom. A complete spring cleaning checklist helps you tackle every room efficiently, without missing the spots that regular cleaning routines overlook. This room-by-room guide breaks the process into manageable steps so you can work through your entire home at a comfortable pace.
Why Start Your Spring Clean Room-by-Room?
When spring arrives, the idea of cleaning an entire house can feel overwhelming. Breaking the process down room by room is the most practical way to manage it. Instead of jumping between tasks across different floors, you can finish one space before moving to the next.
This approach also lets you match your supplies and techniques to each room’s specific needs. A kitchen calls for degreasers and appliance-specific methods, while a bedroom needs mattress care and fabric attention. Doing everything at once leads to half-finished tasks and wasted effort.
Maximizing efficiency with a room-by-room guide
Cleaning one room at a time keeps you focused and makes progress visible. You can see a finished result before moving on, which helps maintain momentum throughout the process. It also prevents the common mistake of spreading yourself too thin — starting five tasks in five rooms and completing none of them.
The psychological benefits of sectioned cleaning tasks

Breaking your spring cleaning into manageable sections boosts motivation. Completing a single room provides a sense of accomplishment that carries you into the next one. Sectioning tasks by room also reduces decision fatigue — you know exactly where to focus, which tools to grab, and when you are done.
Room-by-room spring cleaning for a thorough refresh
A systematic, room-by-room approach ensures nothing gets skipped. Each space in your home has unique cleaning needs — the grease buildup in a kitchen, the moisture issues in a bathroom, the dust accumulation in a bedroom. Working through them individually allows you to give each area the attention it deserves.
Creating a Customizable Spring Cleaning Checklist
Before you start cleaning, put together a checklist tailored to your home. A written plan keeps you on track, ensures nothing gets skipped, and helps you estimate how long each area will take. Walk through each room and note what needs attention — from dusty ceiling fans to expired pantry items.
Essential cleaning supplies for every room
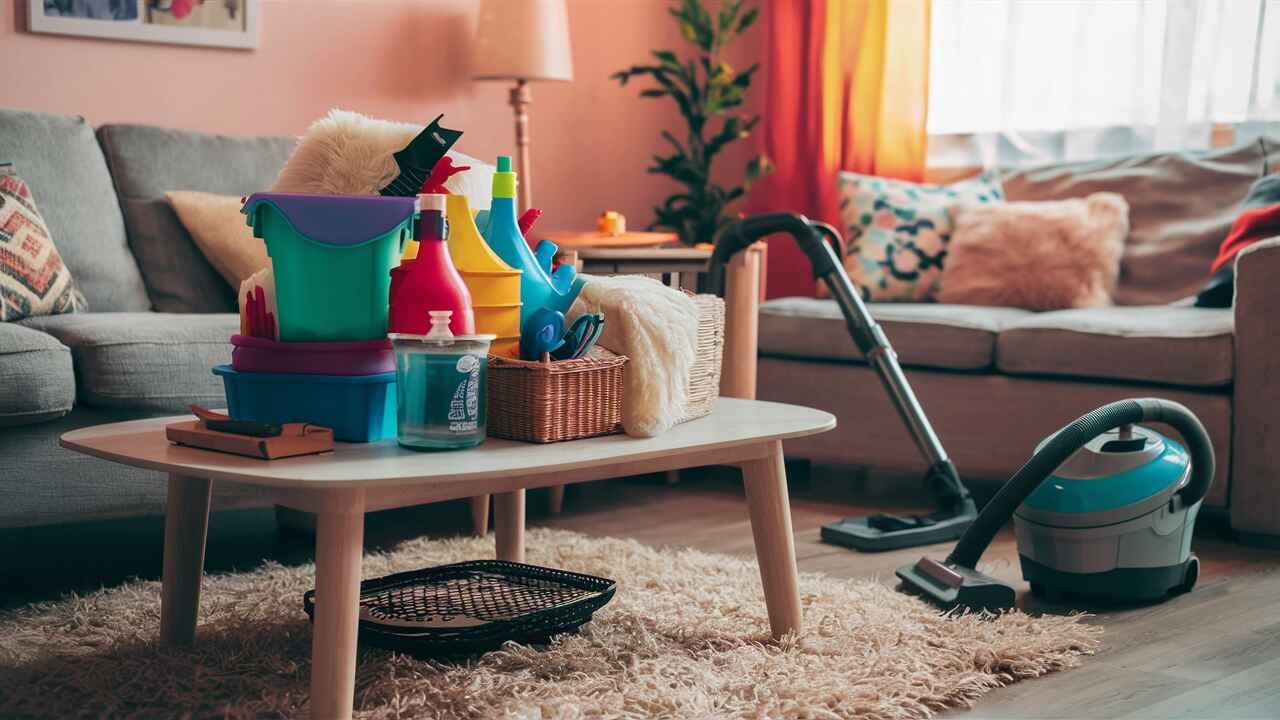
Stock up on microfiber cloths (both flatweave for glass and regular for surfaces), an all-purpose cleaner, a vacuum cleaner with attachments (crevice tool, brush attachment, long-bristle nozzle), a mop, bucket, and rubber gloves. For deeper tasks, keep baking soda, white vinegar, dish soap, and a melamine foam sponge on hand. Specialty tools like blind cleaners, kitchen degreasers, and an extendable microfiber duster make high-reach and hard-to-clean areas much easier. Have decluttering bags or bins ready for items to trash, donate, or relocate to another room.
How to personalize your spring cleaning plan
Tailor your checklist to your home’s specific layout and problem areas. A two-bedroom apartment needs a different plan than a four-bedroom house with a basement and garage. Consider your schedule and energy levels — tackling one or two rooms per weekend over several weeks is more sustainable than trying to finish everything in a single day. Delegate age-appropriate tasks to family members so everyone contributes. You can also download or create a printable checklist to track your progress, room by room.
Deep Clean Secrets for Every Room
Each room in your home collects grime differently. The following breakdown covers what to clean, how to clean it, and the often-forgotten spots that deserve attention during a spring deep clean.
Tackling the kitchen: From appliances to baseboards

The kitchen is typically the most time-intensive room to deep clean. Start by opening windows for ventilation, then work from top to bottom.
- Oven: Prepare a paste of baking soda and water. Apply it inside the walls and floor of the oven, let it sit for several hours or overnight, then spritz with vinegar in a spray bottle and wipe down. Grease and cooked-on food should lift without harsh chemicals.
- Microwave: Microwave a bowl filled with two cups of water and two tablespoons of vinegar (or water with citrus slices) for three minutes. Leave the bowl inside for 15 minutes to let the steam loosen caked-on food. Wipe the interior with a microfiber towel, then clean the exterior with an all-purpose cleaner.
- Refrigerator and Freezer: Empty the entire fridge and freezer. Discard expired food, then remove shelves and drawers to wash them with soapy water. Wipe interior walls with a baking soda solution to neutralize odors. If possible, pull the refrigerator away from the wall and vacuum the condenser coils with a brush attachment — dust-covered coils force the appliance to work harder and use more energy.
- Dishwasher: Wipe the interior with a damp microfiber cloth and a mild cleaner. Place a small bowl of white vinegar on the top rack and run an empty hot cycle to remove buildup and odors. Clean the door gasket and the detergent dispenser with dish soap and water.
- Small Appliances: Wipe the exteriors and cords of your toaster, coffee maker, and kettle with a damp cloth. Shake out crumbs from the toaster over the trash. Descale the coffee machine and kettle by running a cycle with equal parts vinegar and water, then rinse with two cycles of plain water.
- Cutting Boards: Rub lemon juice onto the surface and let it sit for 20 minutes before rinsing. For stubborn stains, sprinkle coarse salt and scrub with the cut side of a lemon half. This sanitizes without chemicals.
- Garbage Disposal: Cut a lemon in half and run both pieces through the disposal with cold water. The citrus cleans the blades and freshens the drain.
- Countertops: For laminate or tile surfaces, dip the cut side of a lemon half in baking soda and gently scrub, then wipe with a damp sponge and dry. For marble or natural stone, mix one tablespoon of liquid Castile soap into one quart of warm water, wipe with a damp cloth, and dry immediately — avoid acidic cleaners like vinegar or lemon on stone surfaces.
- Cabinets: Vacuum the interiors with a crevice attachment, then wipe everything down with dish soap and water. Follow with a water-dampened cloth to remove soap residue. Pay attention to handles and edges where cooking grease accumulates.
- Sink and Faucets: Rub lemon juice onto faucet taps and let it sit overnight to combat limescale buildup. Wipe with a damp cloth in the morning. Scrub the sink basin with a baking soda paste, rinse, and dry for a streak-free finish.
- Pantry: Remove everything from the shelves. Wipe shelves clean and check expiration dates. Group items by category — baking supplies, canned goods, snacks — and place the oldest items at the front so they get used first.
- Knives and Tools: Sharpen kitchen knives while you are in the cleaning mindset. A sharp knife is safer and more efficient than a dull one.
Refresh your bathroom: Scrubbing, decluttering, and organizing
Bathrooms collect moisture, soap scum, and bacteria quickly. A thorough spring clean here makes a noticeable difference in how the space looks and feels.
- Shower and Tiles: Spray your shower cleaner over tiles and let it sit while you work on other areas. For the showerhead, pour about two cups of white vinegar into a zip-top bag and tie it over the head, making sure the nozzle is submerged. Let it sit overnight to dissolve mineral deposits, then remove the bag and run water to flush remaining buildup.
- Bathtub: A melamine foam sponge works well for scrubbing away soap scum and ring marks on tub surfaces without scratching the finish.
- Shower Curtain Liner: Remove the liner and toss it in the washing machine with a few fluffy towels and regular laundry detergent. The towels help scrub away mildew during the wash cycle. Dry on low heat for 10 minutes and rehang — this extends the life of the liner and saves you from replacing it.
- Toilet: Apply a disinfecting bowl cleaner inside, making sure to get under the rim. Follow the product’s recommended contact time for proper disinfection, then scrub with a toilet brush. Wipe the exterior — including the base, the tank, and the handle — with a disinfectant cloth. Remove and clean the seat bolts if accessible.
- Sink and Mirror: A melamine foam sponge removes hardened toothpaste from the sink basin. Spray vinegar over the basin and faucet to dissolve mineral buildup, then wipe clean. For the mirror, use a flatweave microfiber cloth sprayed with glass cleaner — spraying directly onto a framed mirror can let moisture seep behind the glass.
- Medicine Cabinet and Drawers: Empty and wipe all shelves and drawer interiors. Toss expired medications, dried-out cosmetics, and toiletries you no longer use. Restock only what you actually need and use regularly.
- Combs and Brushes: Soak hair tools in a container with 1½ cups water, ½ cup distilled white vinegar, and 20 drops of tea tree, lavender, or eucalyptus oil for 20 minutes. Rinse and air dry. This removes product buildup and bacteria.
- Exhaust Fan: Remove the cover and wash it in soapy water. Vacuum or wipe the fan blades and housing to restore proper airflow — a clogged fan can lead to moisture problems and mold growth.
- Drains: Clear sink and tub drains of hair and buildup. Pour half a cup of baking soda followed by half a cup of vinegar down the drain, wait 15 minutes, then flush with boiling water. A drain cover or screen prevents future clogs.
- Grout: Scrub grout lines with a baking soda paste and a stiff brush. If grout is crumbling or discolored beyond cleaning, consider resealing it to prevent moisture damage over time.
- Towels and Bathmats: Launder all towels, bathmats, and washcloths. Replace any that have become thin, rough, or musty-smelling despite washing.
- Floor: Start with a dry mop or sweep to pick up hair and dust. Follow with a wet mop, paying extra attention to corners and the area around the base of the toilet where buildup collects.
The living room deep clean: Couches, cushions, and more
The living room hides dust and dirt in places you don’t look during regular cleaning. A spring deep clean should reach all of them.
- Upholstered Furniture: Remove cushions and vacuum all sides, using the crevice tool to reach into seams, corners, and the frame beneath. For washable fabrics, mix one teaspoon of dish soap in a gallon of water and gently scrub with a soft cloth. For leather furniture, use a dedicated leather cleaner and conditioner. Toss any washable throw blankets and decorative pillows into the laundry.
- Television and Screens: Spray glass cleaner onto a flatweave microfiber cloth — not directly onto the screen — and wipe down the TV. Clean the remote control with a disinfectant wipe, paying attention to the buttons where grime accumulates.
- Coffee Table and Media Console: For solid wood, wipe with a barely damp microfiber cloth. For glass tops, use glass cleaner and a flatweave cloth. Address sticky residue with a damp cloth and a small amount of dish soap.
- Bookshelves: Remove all books and wipe the shelves from top to bottom. Before placing books back, dust the bindings with a duster or microfiber cloth. This is also a good opportunity to sort through your collection and set aside books to donate or sell.
- Lampshades: Run the long-bristle vacuum attachment up and down fabric lampshades. A lint roller works as a quick alternative. For glass or metal shades, wipe with a damp cloth and dry.
- Wall Art and Picture Frames: Wipe glass with a flat-weave microfiber cloth sprayed with glass cleaner. Never spray directly on the frame. Use a soft brush, like a clean paintbrush, to dust detailed or ornate frames without damaging them.
- Indoor Plants: Wipe leaves with a damp cloth or paper towel to remove dust, which helps the plant absorb light more effectively. Wipe down the planter and the saucer beneath it.
- Wires and Cables: Untangle cords behind the TV and media console. Use cable ties or clips to group and secure them out of sight. This improves both safety and appearance.
- DVD, Book, and Media Collections: Sort through physical media collections. Sell or donate anything your household no longer uses or watches.
Bedroom refresh: Beyond making the bed
A proper spring clean in the bedroom goes well beyond changing the sheets. Dust mites, allergens, and clutter accumulate in places you might not think about during weekly tidying.
- Mattress: Strip the bed completely. Sprinkle baking soda over the entire mattress surface and let it sit for at least 30 minutes — an hour is better — to absorb odors and moisture. Vacuum thoroughly with the upholstery attachment. Flip and rotate the mattress if the manufacturer recommends it. This should happen at least twice a year.
- Pillows and Comforters: Wash pillows in hot water according to the care label. Memory foam and feather pillows cannot be machine-washed the same way as polyester fills, so check instructions before starting. Launder duvet covers and mattress pads separately. Pillows benefit from seasonal washing, not just annual, because dust mites accumulate inside them over months of use.
- Headboard: Wipe hard surfaces with a clean microfiber cloth. Vacuum upholstered headboards with the long-bristle attachment to remove dust and allergens that collect in the fabric.
- Nightstands: Remove everything from the surface and drawers. Wipe down all surfaces with a damp microfiber cloth. Dust small items like alarm clocks, lamps, and picture frames before putting them back. Declutter anything that does not belong.
- Dressers and Drawers: Empty each drawer, wipe the interior, and replace contents neatly. Fold and organize clothing by category. Set aside anything you have not worn in the past year for donation.
- Drapes and Curtains: Toss curtains in the dryer on the coolest setting for 15 minutes to shake off dust, then rehang immediately to prevent wrinkles. If they are machine-washable, launder them according to the care label instead.
- Windows: Clean glass with a flatweave microfiber cloth. Wipe window sills and tracks with a damp cloth to remove accumulated dust and debris. Wash window screens by removing them, scrubbing with soapy water, rinsing, and letting them dry completely before reinstalling.
Laundry room overhaul
The room that cleans your clothes needs its own deep clean. Moisture and residue build up quickly here.
- Washing Machine: Detach the detergent dispenser and scrub it with dish soap and water. Wipe the door and the rubber gasket — fold back the rubber seal to get into hidden crevices where mold and residue collect. Add half a cup of liquid chlorine bleach to the detergent dispenser, fill the bleach compartment as well, and run a normal cycle with warm water. Wipe the exterior with an all-purpose cleaner.
- Dryer: Vacuum or brush out the dryer vent tubing to remove lint buildup — this also reduces fire risk. Remove the lint screen and scrub it with a toothbrush and soapy water to remove the invisible residue that dryer sheets leave behind, which reduces airflow over time. Let it air dry completely before replacing. Sweep or vacuum behind and around the machine.
- Surrounding Area: Dust shelving and wipe down the utility sink if you have one. Check the area around the water heater for any leaks or issues.
- Miscellaneous Piles: Sort through items that have accumulated in the laundry area — hand-washables waiting to be done, clothes needing minor repairs like a missing button or a fallen hem. Set aside time to handle these tasks while you are in the room.
Dining room
Often skipped during weekly cleaning, the dining room benefits from a seasonal refresh.
- Table and Chairs: Disinfect the table surface and chairs. Polish the wood furniture if the finish needs attention. If chairs have fabric seat pads, launder or vacuum them.
- Table Linens: Wash tablecloths, cloth napkins, and runners. Shine silverware and polish serving pieces that may have tarnished.
- Display Items: Dust china, glassware, and decorative pieces on display. Clean the interior of a hutch or display cabinet if you store dishes there.
- Light Fixtures: Dust chandeliers or pendant lights. Remove glass shades and soak them in warm soapy water, then dry and reattach.
- Floor Registers and Vents: Remove vent covers, wash them in soapy water, let them dry, and replace. Vacuum inside the vent opening to remove accumulated dust.
Home office
A clean workspace supports focus and productivity. Spring is a good time to reset the room where you spend working hours.
- Desk and Drawers: Empty drawers completely. Wipe interior and exterior surfaces. Sort contents and discard anything unnecessary — dried-out pens, old sticky notes, outdated paperwork.
- Files and Paperwork: Shred documents you no longer need. File or scan important papers. Update home inventory or insurance documents while you are in organizing mode.
- Electronics: Turn the keyboard upside down and gently shake out debris, then use compressed air or a soft brush between keys. Wipe the mouse, monitor (with a microfiber cloth), and the full desk surface. Untangle and organize cables behind the desk.
- Bookshelves: Dust shelves and tidy book spines. Donate books you no longer reference or plan to reread.
Throughout the House: The Overlooked Areas
Some cleaning tasks apply to every room but are easy to overlook. Tackling them systematically ensures no surface is neglected.
Ceilings, walls, and high-reach areas
- Ceiling Fans: Use an extendable microfiber duster, or try the pillowcase trick — slide a clean pillowcase over each blade and pull it off slowly. The dust stays trapped inside the case instead of falling onto furniture below. Don’t forget to dust lightbulbs and soak any glass light covers.
- Ceilings and Walls: Swipe ceilings and walls with a clean, dry microfiber mop. The wide head catches cobwebs, and the long pole reaches corners and behind furniture. For textured ceilings or stucco walls, use a feather duster instead to avoid damaging the surface.
- Baseboards: Vacuum baseboards with the brush attachment, or run a broom along them to knock off loose dust. For baseboards with sticky buildup, scrub with soapy water and dry thoroughly afterward to prevent warping.
Windows, curtains, and blinds
- Windows: Clean glass with a flat-weave microfiber cloth and a glass cleaner. Wipe window trim with a damp microfiber cloth. Clean windowsills where dust and dead insects collect.
- Window Screens: Remove screens and scrub with soapy water. Rinse with a garden hose and let them dry completely before reinstalling.
- Curtains and Drapes: Toss in the dryer on the coolest setting for 15 minutes to remove dust, then rehang immediately. For machine-washable curtains, launder according to the care label.
- Blinds and Pleated Shades: Use the long-bristle vacuum attachment to remove dust along slats and pleats. In kitchens, use a damp microfiber cloth instead — grease makes dust particles stick, so a vacuum alone won’t be effective.
Floors, rugs, and under furniture
- Area Rugs: Roll area rugs and vacuum underneath to remove dirt and debris that has settled beneath. For wall-to-wall carpeting, use the edger attachment where the baseboard meets the floor. On carpeted stairs, put on a rubber dish glove and run your fingers along the edge of each step — static electricity pulls out dirt and pet fur from crevices. Vacuum as you go.
- Hard Floors: Sweep or vacuum first to remove crumbs and debris, then mop. Start at the far corner of the room and work toward the door so you don’t walk back across your freshly mopped floor. Toss the reusable mop head or microfiber pad in the washing machine when you are done.
- Under Furniture: Move sofas, beds, and large pieces to vacuum and mop underneath. Dust and hair accumulate in these hidden areas more than most people expect.
Light fixtures, switches, and door hardware
- Light Fixtures: Dust lightbulbs and fixture housings. Remove glass shades and soak in warm soapy water, then dry and replace.
- Light Switch Plates: Wipe with a disinfectant cloth. These are high-touch surfaces that accumulate fingerprints and germs throughout the year.
- Doors and Door Knobs: Wipe down doors with a damp microfiber cloth, paying attention to fingerprints around handles. Disinfect door knobs and handles throughout the house.
- Floor Registers and Vent Covers: Remove covers, wash in soapy water, dry, and replace. Vacuum inside the duct opening to remove accumulated dust.
- Air Filters: Check your HVAC air filters and replace or clean them. Clean filters improve air quality and help your heating and cooling system run more efficiently.
The Forgotten Spots: Spring Cleaning Your Closet and Storage Areas
Deciding what to toss: Keeping or donating?
Sort through clothes, shoes, and accessories, trying on items if needed. Create piles for keeping, donating, and tossing based on wear, fit, and whether you have actually used the item in the past year. Apply the same approach to storage areas like the attic, basement, or garage — categorize as you go so you know exactly what is where.
Organizational hacks for a tidier closet
Organize clothing by type, color, or occasion for easy outfit planning. Use matching hangers and space-saving techniques like rolling or vertical folding. Store off-season items in clear bins with labels for quick access when the seasons change.
Maximizing space: Storage solutions that work

Invest in shelving, bins, and baskets to maximize vertical space and keep items off the floor. Use drawer dividers and door organizers to create designated spots for accessories, cleaning supplies, or small items. Consider vacuum storage bags for bulky linens, blankets, and out-of-season clothes — they compress items to a fraction of their size and protect against dust and moisture.
Outdoor and Exterior Spring Cleaning
Spring cleaning extends beyond your interior walls. The exterior of your home takes a beating over winter and benefits from seasonal attention.
- Porch and Walkways: Sweep away debris, dead leaves, and dirt. Wash the front door and doorframe — touch up paint if needed. Clean or replace the welcome mat.
- Siding and Exterior Walls: Wash siding with a garden hose or a pressure washer on a low setting. Wipe away cobwebs from eaves, corners, and light fixtures.
- Deck and Patio: Sweep, power wash, and stain or seal the deck if the finish has worn. Clean outdoor furniture with soapy water and let it dry in the sun. Check for loose boards, nails, or screws that need repair.
- Windows and Exterior Fixtures: Clean exterior window glass. Wash outdoor light fixtures and replace any burned-out bulbs.
- Gutters and Roof: Clear gutters of leaves and debris. Inspect roof shingles for damage from winter storms.
- Garage: Sweep the floor and organize tools, sports equipment, and storage. Dispose of or donate items you no longer use. Power wash the garage door.
- Grill: Clean the grates with a grill brush. Wipe down the exterior and check propane levels or connections before the first cookout of the season.
- Landscaping Basics: Trim trees, bushes, and overgrown shrubbery. Check sprinkler systems and repair any damaged heads. Replace broken bricks, pavers, or stones in walkways. Clean outdoor bins.
Children’s Items Spring Cleaning
Kids’ belongings accumulate grime and outgrown items faster than almost anything else in the house.
- Toys: Sort, dust, and disinfect toys. Wipe plastic toys with a disinfectant solution. Donate toys that are no longer being played with.
- Clothing: Wash and organize children’s clothing. Set aside anything that has been outgrown for donation or storage for a younger sibling.
- Bath Toys: Disinfect bath toys by soaking them in a solution of warm water and white vinegar for 15 minutes. Squeeze out water from the squeeze toys and let everything air dry completely to prevent mold inside.
Maintaining a Clean Home Post-Spring Cleaning
Developing a simple cleaning routine
Create a manageable daily, weekly, and monthly cleaning schedule so your home doesn’t slide back to its pre-spring-clean state. Focus on high-traffic areas and problem spots between deep cleans. Daily tasks might include wiping kitchen counters and doing a quick evening tidy-up. Weekly tasks can cover vacuuming, mopping, and bathroom wipe-downs. Monthly tasks handle the deeper work like cleaning appliances and dusting high surfaces.
Seasonal swaps: Refreshing your home for spring
Swap out heavy winter textiles — thick comforters, flannel sheets, and wool throws — for lighter, breathable fabrics suited to warmer weather. Wash bed linens, pillowcases, and curtains to start the season fresh. Open windows regularly to let in fresh air and naturally ventilate rooms that may feel stale after months of being sealed up.
Keeping your cleaning supplies updated and ready
Take inventory of your cleaning products and tools after your spring clean. Restock anything that is running low and replace worn-out items like frayed microfiber cloths or a mop head that has seen better days. Store supplies in a designated area — a cleaning caddy or a specific closet shelf — so everything is easy to grab. Consider switching to eco-friendly and non-toxic products to reduce chemical exposure in your home, especially if you have children or pets.
Bonus Tips: Making Spring Cleaning Easier and More Effective
Cleaning tools that improve your results
Microfiber mops and dusters trap dirt and dust more effectively than traditional cotton alternatives. A steam cleaner deep cleans floors, grout, and upholstery without chemicals. A vacuum with HEPA filtration captures allergens, pet dander, and fine dust particles that standard vacuums tend to recirculate back into the air. If you have pets, look for models specifically designed to handle pet hair on upholstery and carpeted stairs.
Time-saving strategies for efficient cleaning
Work top to bottom in each room so dust and debris fall to surfaces you have not yet cleaned. Use task-specific tools — crevice attachments for tight spaces, brush attachments for baseboards, and long-bristle nozzles for lampshades and upholstery. When decluttering, tackle one category at a time (all clothes, then all books, then all papers) rather than jumping between item types. This keeps your sorting consistent and reduces the urge to get sidetracked.
How to involve the whole family
Assign age-appropriate chores with clear, specific instructions. Younger children can sort toys or match socks, while older kids can vacuum, wipe surfaces, or clean their own rooms. Set a timer and turn it into a challenge, or play music to keep the energy up. Celebrate the finished result together — ordering dinner, watching a movie, or simply enjoying the clean space makes the effort feel worthwhile and sets the tone for maintaining it.
FAQs
What should be included in a spring clean?
A thorough spring clean should include decluttering, deep cleaning, and organizing every room of the house. Focus on areas that regular cleaning overlooks — baseboards, light fixtures, ceiling fans, closet interiors, mattress care, appliance deep cleans, and behind or beneath large furniture.
What supplies do I need for spring cleaning?
Stock up on microfiber cloths, an all-purpose cleaner, baking soda, white vinegar, dish soap, a vacuum with attachments, a mop, and rubber gloves. A melamine foam sponge, a steam cleaner, and specialty tools like blind cleaners or drain snakes are also useful for tougher tasks.
What month should I start spring cleaning?
Most people begin spring cleaning in late March or early April, as the weather warms up and the days grow longer. Choose a weekend or a stretch of days when you have enough time to make real progress without feeling rushed.
How long does spring cleaning take?
For a full-house deep clean, expect to spend two to four weekends if you tackle a few rooms at a time. A single room can take anywhere from one to four hours, depending on its size and how much attention it needs. Spreading the work over several weekends is more sustainable than trying to finish in one marathon session.
How do I deep clean my mattress?
Strip all bedding and sprinkle baking soda over the entire mattress surface. Let it sit for at least 30 minutes — longer is better — to absorb odors and moisture. Vacuum thoroughly with the upholstery attachment. Flip and rotate the mattress if the manufacturer allows it. Repeat this process at least twice a year for the best results.
What is the fastest way to spring clean?
Work room by room rather than task by task. Start each room from the top — ceilings, fans, and high shelves — and work down to the floors. Declutter first, then clean. Surfaces that are already cleared off are much faster to wipe down than surfaces cluttered with items you have to move.
How often should you spring clean your house?
A comprehensive spring cleaning should happen once a year. Supplement it with smaller deep cleaning sessions every three months for high-use areas like kitchens and bathrooms to prevent buildup from accumulating again.
What should I throw away when spring cleaning?
Discard expired food, medications, and toiletries. Toss worn-out cleaning tools, dried-out cosmetics, and anything broken that you have been meaning to fix for months. Donate clothes you have not worn in the past year and books or media you will not use again.
With this room-by-room spring cleaning checklist, you have a complete plan to refresh every space in your home — inside and out. Work at your own pace, check off tasks as you go, and enjoy the result: a clean, organized home ready for the season ahead.