


Are you tired of struggling to find your tools in a cluttered garage or workshop? It’s time to take control and transform your space with these practical garage organization ideas and DIY storage solutions. Whether you’re working with a single-car garage or a spacious basement workshop, the right combination of wall storage, mobile workstations, and smart layout planning can turn even the most chaotic space into an efficient workshop you actually enjoy using.
Getting Started with Garage Workshop Organization
Before you buy a single shelf bracket or drive a single screw, take stock of what you’re actually working with. How many square feet do you have? Do you need to park a car inside? What types of projects do you tackle most often — woodworking, automotive, gardening, or a mix of everything? Answering these questions first will save you from building storage that looks great but doesn’t fit your real workflow.
Choosing the Right Organization Ideas for Your Space
The best garage workshop organization plan starts with zoning. Divide your garage into functional areas: a primary workbench zone, a power tool station, a hand tool wall, a finishing and paint area, and a general storage zone. Even in a small space, thinking in zones prevents you from scattering related items across different corners and then wasting time hunting for them.
For a one-car garage (roughly 12×20 feet), prioritize wall-mounted and fold-away solutions so you can still park a vehicle when needed. In a two-car garage or larger, you have room for a dedicated workbench island, floor-standing cabinets, and ceiling-mounted overhead racks. Measure your available wall space, note the location of electrical outlets and windows, and sketch a rough floor plan before committing to any build.
DIY vs. Pre-Made: What’s Best for Tool Storage?
Both approaches have their place. A DIY solution like a French cleat wall system or a plywood workbench lets you customize dimensions to fit your exact space and tool collection — and it’s often cheaper. A pre-built option like a Husky mobile workbench (which comes with nine drawers, a solid wood top, and a built-in power strip with four outlets and two USB ports) offers convenience and durability you’d spend a weekend replicating.
A good middle ground is kits. The Simpson Strong-Tie workbench kit, for example, requires you to just add lumber — no advanced joinery or complex cuts. It’s a practical starting point if you’re new to building and want a solid bench without the guesswork.
First Steps to Take in Organizing Your Small Garage Workshop

Start by pulling everything out. Yes, everything. Sort your tools and supplies into clear groups: power tools, hand tools, fasteners and hardware, adhesives and finishes, seasonal items, and things you haven’t touched in two years. Be honest — if it’s broken, outdated, or duplicated, donate it or toss it. This single step usually clears 20 to 30 percent of the clutter in most garages.
Once you can see what you actually own, assign each group a home based on how often you use it. Daily-use tools belong within arm’s reach of your workbench. Seasonal items like holiday decorations and snow gear go up high or in the back. This frequency-based approach is the foundation that every other storage solution in this article builds on.
Maximizing Space with Innovative Storage Ideas
The biggest mistake most people make is treating their garage floor as the primary storage surface. Your walls and ceiling hold far more potential than you think — and the best part is, wall-mounted and overhead systems keep the floor clear for vehicles, large projects, and easy movement.
Utilizing Vertical Space: From Pegboards to Shelves
A standard pegboard wall is one of the fastest wins in any garage. Mount it slightly away from the wall using furring strips or spacers behind the frame so hooks can lock in properly. For an even more useful setup, trace the outlines of each tool directly onto the pegboard with a marker. This “shadow board” technique means you always see exactly what’s missing — and where it goes back.
If you want something more flexible, a French cleat system is hard to beat. Rip strips of ¾-inch plywood at a 45-degree angle, mount one strip horizontally on the wall (angled side up, facing out), and attach the matching strip (angled side down) to the back of any shelf, tool holder, or cabinet you want to hang. The interlocking angles lock together under gravity, and you can slide any piece left, right, or remove it entirely in seconds. As your tool collection grows, you just build new holders and click them onto the wall.
For small metal tools — drill bits, wrenches, chisels, and pliers — heavy-duty magnetic strips mounted near your workbench keep them visible and instantly accessible. No digging through drawers mid-project.
Space-Saving Solutions: Racks, Cleats, and Overhead Storage
Most garages have 12 to 16 inches of open space above the garage door tracks — that’s prime real estate for overhead shelving. A simple 4×6-foot shelf made from 2x4s and plywood, lag-bolted into the ceiling joists, can hold roughly 160 pounds of storage bins, seasonal gear, or camping equipment. Plastic totes with lids slide on and off easily, and everything stays out of the way until you need it.
For even more ceiling storage, a sliding tote rack system uses wooden T-tracks mounted along the rafters. Standard heavy-duty bins slide along the tracks like drawers overhead — you can push them back into deeper ceiling space or pull them forward for access.
Long materials — lumber, PVC pipe, conduit, trim, and flashing — deserve their own wall-mounted lumber racks. Tiered steel or wooden brackets along the perimeter of the garage keep these items horizontal, organized, and off the floor. A plastic lattice rack is another cheap alternative: cut matching lattice pieces and screw them to wall studs and ceiling cleats to create open slots for odd-length leftovers. It costs almost nothing and saves you from buying yet another piece of pipe because you couldn’t find the one you already own.
Ladders are another bulky offender. Hang them from ceiling-mounted rollers — a pair of corner braces lag-screwed to joists, with a roller carriage that lets you slide one end of the ladder in, then the other. Secure it with an elastic cord so it can’t roll out and fall.
Transforming Clutter into a Functional Workshop

The difference between a cluttered garage and a functional workshop isn’t budget — it’s intention. When every tool has a labeled home, when fasteners are sorted by type and size into small drawers or bins, and when your workbench is clear the moment you finish a project, your garage stops being a dumping ground and starts working like a real shop.
Plastic storage bins are your best friend for small parts. Label every bin clearly — “8 wood screws,” “electrical wire nuts,” “wood glue and epoxy” — and group them by category on dedicated shelves. The five minutes you spend labeling saves you hours over a year of not rummaging.
Creating Storage for Every Tool
Organizing Power Tools: Racks, Studs, and Drawer Systems
Power tools take up serious space, and leaving them scattered across your workbench or on the floor creates a real safety hazard. Mount larger tools like circular saws and jigsaws on wall hooks or dedicated shelf brackets. Keep blades and accessories stored with the tool they belong to, not in a random drawer across the room.
A cordless drill charging station is one of the highest-impact builds for any workshop. Construct a wall-mounted cubby unit that holds each drill, its batteries, and its charger in one designated area. Run a power strip inside the station so everything stays plugged in and charged. No more dead batteries mid-project or tangled cords draped across your bench. Build it wide enough to expand — most people underestimate how quickly cordless tool collections grow.
For sandpaper, build a small tabletop organizer with divided slots — one slot per grit, labeled on the front. Stack your random orbital sanders on the shelf above. Sandpaper is one of those items that turns into a crumpled mess in a drawer if you don’t give it a proper home.
DIY Tool Organizers: From Scrap Wood to Hardboard Creativity
You don’t need fancy materials to organize your tools. Some of the best storage solutions come from scraps sitting in your own shop:
- Clamping racks: Screw strips of scrap wood to the wall or the side of your workbench with enough gap to slide in the handles. Mount them at varying heights to accommodate F-style clamps, C-clamps, and bar clamps. Clamps are one of the most awkward items to store — a dedicated rack eliminates the pile.
- Cord and hose hooks: Pieces of 3-inch ABS plastic plumbing pipe, end-capped and screwed to a 2×6 board, create strong, wide hooks that won’t kink your extension cords or air hoses. They’re cheap, hold serious weight, and last for years.
- Garden tool hanger: Take two 1×4 boards. First, drill a series of 2-inch holes along the edge, centered about 1 inch from the edge — this leaves a 1½- inch slot in front to slip tool handles through. Screw it to the second 1×4 for a backer board, add 45-degree brackets underneath to prevent sagging, and mount it to the wall. Rakes, shovels, and brooms hang neatly and stop falling over.
- Pallet storage: Free pallets can be mounted to exposed wall studs to create vertical slots for long-handled yard tools. Two screws into the pallet, one into each stud behind it — that’s all it takes. The natural gaps between pallet slats hold tool handles perfectly.
- Old hose holders: Cut a worn-out garden hose into 7-inch pieces, slit them lengthwise, and nail them to the wall. The rubber grips tool handles without scratching them — a zero-cost solution.
Floor Space Optimization: The Role of Mobile Benches and Stands
Anything that sits on your garage floor should either be there permanently or be able to move. Mobile workbenches on locking caster wheels are a game-changer — roll them to the center of the garage when you’re working, then tuck them against the wall when you need to park. Use the under-bench space for stacked plastic bins, paint cans, or large power tools.
A folding mobile workbench takes this further: it gives you a sizable work area but folds up to only 7 inches thick against the wall. Materials cost roughly $100 at most home centers, and you can adjust the frame dimensions to fit your space.
If you move heavy materials frequently, build a pallet dolly. Attach four swiveling casters to the corners of a reinforced pallet, and you have a low-profile platform for hauling lumber, sheet goods, or heavy tools across your shop in one trip instead of ten armloads.
Special Considerations for Small Garages
Adapting Big Ideas for Small Workshop Spaces
A small garage doesn’t mean small ambitions — it just means smarter planning. A folding wall-mounted workbench with heavy-duty hinges and drop-down legs gives you a full work surface when you need it and folds completely flat when you don’t. You can park the car inside the same evening.
For families, a bike and scooter rack built from 2x4s or PVC pipe can hold the whole family’s cycling gear in a single wall section, freeing up floor space that bikes usually steal. Mount it at a height where even kids can grab and return their own bikes.
A rotating corner shelf unit built on two lazy Susan turntables (one at the base, one under the top shelf) turns a dead garage corner into accessible storage that spins to meet you. Screw the top shelf to the wall for stability — it can’t tip, but it rotates freely.
Custom Storage Solutions to Maximize Every Inch
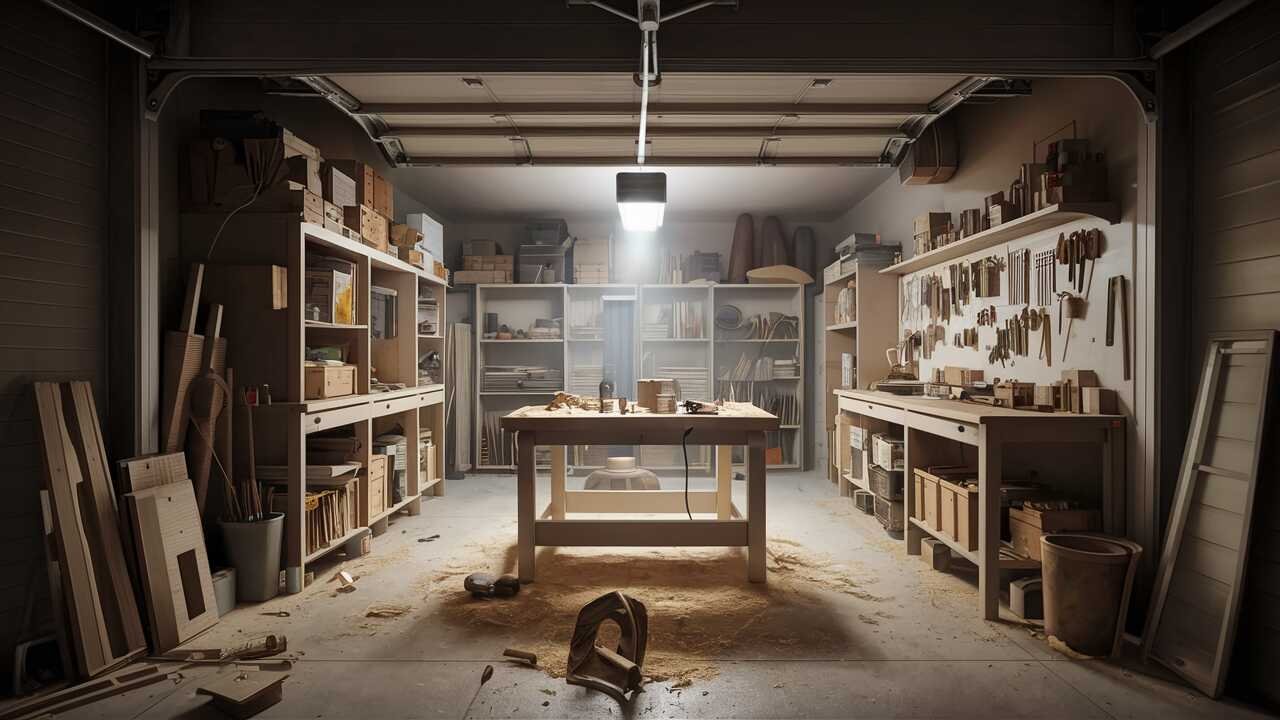
In a tight garage, every inch matters. Here are spots most people overlook:
- Between wall studs: The cavity between studs is usually 3½ inches deep — enough for narrow shelves to hold spray cans, glue bottles, or small parts bins.
- Behind the garage door: When the door is open, the wall space behind it is unused. Install shallow shelves or a narrow pegboard panel there for items you don’t need daily.
- Above the garage door: 12 to 16 inches of clearance above the door track fits a full overhead shelf for storage bins.
- Side of the workbench: Mount a swing-out pegboard panel on hinges attached to the side of your bench. It folds flat when closed and swings open to reveal two-sided tool storage.
Turning Your Small Garage into a Fully Functional Workshop
The secret to making a small garage work as a workshop is the zone approach — even if your zones overlap. Dedicate one wall to your primary workbench and hand tool pegboard. Use the opposite wall for power tool storage, a charging station, and shelving. Put overhead racks above the car-parking zone for seasonal storage. Reserve one corner for a car care zone with shelves tailored to polishes, microfiber towels, wheel cleaner, and scrub brushes — everything you need for vehicle maintenance in one well-lit spot.
With this layout, you can walk into your garage, know exactly where everything is, work on a project, clean up in five minutes, and still park inside at night.
Advanced Workshop Organization Ideas
Incorporating the Best Garage Storage Systems
As your workshop matures, you may want to invest in commercial modular storage systems. Systems from Gladiator, Rubbermaid, and similar brands offer wall-mounted track systems with interchangeable hooks, shelves, and cabinets that lock into place. They’re more expensive than DIY but extremely durable and reconfigurable.
A lockable storage cabinet is worth considering if you have kids or share your garage. Chemicals, sharp tools, solvents, and pest control products should be behind a locked door — not on an open shelf at child height. Build one from plywood with a simple hasp lock, or buy a steel unit designed for the purpose.
Organizer Tips from the Family Handyman and Garage Journal
Some of the best garage workshop organization ideas come from the community. Resources like Family Handyman and Garage Journal offer detailed build plans, real-world reviews, and problem-solving threads from people who’ve tackled every size and shape of garage. Before you start a big project, search these platforms — chances are someone has already built exactly what you’re planning and documented what worked and what didn’t.
Making Your Workshop Work Harder with Smart Organization
An organized workshop isn’t just about looks — it directly affects your safety and productivity. Tools on the floor are tripping hazards. A cluttered workbench leads to accidents with sharp blades and hot glue. Sawdust accumulation near electrical panels is a fire risk.
Beyond storage furniture, consider these upgrades:
- Lighting: Replace a single overhead bulb with LED shop lights positioned directly above your workbench and along your primary tool wall. Good lighting prevents mistakes and reduces eye strain.
- Dust collection: Even a basic shop vacuum connected to your miter saw and sander with a simple hose system keeps sawdust from coating every surface in your shop.
- Power access: Mount a power strip on the front of your workbench and another near your charging station. Running extension cords across the floor is both a tripping hazard and a sign that your electrical layout needs attention.
Invest in storage solutions that adapt as your needs evolve. A modular wall system today can hold ten tools — and thirty next year, with just a few more hooks and shelves added to the same framework.
The Ultimate DIY Garage Storage Projects
How to Build Your Own Storage Racks and Cabinets
Building your own storage from plywood and 2x4s gives you full control over size, strength, and layout. A basic wall cabinet with adjustable shelves costs a fraction of a pre-built unit and can be customized with drawers, dividers, and doors to match your exact needs.
Here are two weekend projects worth tackling:
- Stacked recycling tower: Build a vertical frame from 2×2 lumber with angled rungs that hold five plastic bins in a staggered, gravity-fed arrangement. Each bin tilts forward for easy access, and the whole unit takes up about 2×3 feet of floor space. Materials cost under $50, and the build takes roughly an hour.
- Fishing rod organizer: Slice a pool noodle into sections, thread a PVC pipe through the center, and mount the assembly to wall brackets. The noodle cushions the rods while the pipe keeps them aligned and tangle-free. It’s a clever, nearly free solution for an item that’s notoriously difficult to store.
Creating a Wall Storage System That Grows with You
The French cleat system deserves its own section because of how well it scales. Start with a row of cleats along one wall. Add a few simple holders for your most-used hand tools — a chisel rack, a saw hook, a shelf for your square and level. Over the following weeks and months, build new holders as you identify gaps. Because every piece interchanges with the same cleat mount, you can rearrange the entire wall in minutes without drilling new holes.
Use ¾-inch plywood for the cleats (ripped at 45 degrees on a table saw) and mount them to wall studs with 2½-inch screws, spaced 16 inches apart. Each cleat supports roughly 50 pounds when properly anchored — more than enough for any hand tool or small shelf.
DIY Hardware Organizer: A Project That Makes a Difference
A well-sorted hardware collection saves enormous time during projects. Small parts organizers with clear, pull-out drawers are available at most home centers and can be labeled by fastener type, size, and material. Mount a strip of them on the wall near your workbench so you can grab what you need without breaking your workflow.
For a budget build, repurpose mason jars with their lids screwed to the underside of a shelf. The jars hang below, contents visible at a glance, and they screw off when you need to pour out a handful of screws or nails. Sort everything by type — wood screws separate from machine screws, washers separate from anchors — and label each container.
FAQs
How do I organize my garage into a workshop?
Start by decluttering and sorting your tools by category. Then plan zones: a primary workbench area, a hand tool wall, a power tool station, and a general storage section. Use wall-mounted solutions like pegboards, French cleats, and magnetic strips to get tools off the floor, and add overhead racks for seasonal or lightweight items. If you still need to park a car, prioritize fold-down and mobile solutions.
How do I organize my shop garage?
Assess your space and group tools by frequency of use. Mount the tools you reach for daily within arm’s reach of your bench. Store weekly-use items on nearby shelves, and push seasonal or rarely used items overhead or to the back wall. Use a combination of wall-mounted pegboards, shelving units, mobile workbenches, and labeled bins to keep everything accessible.
What is the best way to organize a workshop?
There’s no single answer — it depends on your projects and space. But the principles are consistent: maximize vertical and overhead space, give every tool a specific home, use mobile furniture for flexibility, label everything, and re-evaluate your system every few months as your needs change. A French cleat wall is one of the most versatile starting points because it adapts without requiring new holes or hardware.
How much does a professional garage organizer cost?
Professional garage organization services typically range from $500 for a basic setup to $5,000 or more for a full custom system. However, most of the projects in this article can be built with plywood, 2x4s, screws, and a weekend of work for well under $300. A folding workbench costs about $100 in materials. A full French cleat wall for one section of your garage runs $50 to $150 depending on size. You don’t need a big budget to make a big difference.
What is a French cleat, and how do I build one?
A French cleat is a wall-mounting system made from strips of wood ripped at a 45-degree angle. One strip mounts to the wall (angled edge pointing up and away from the wall), and the matching strip attaches to the back of whatever you want to hang (angled edge pointing down). The two angles interlock, creating a secure, gravity-held mount that’s easy to slide sideways and remove. Rip ¾-inch plywood into 3-inch-wide strips on a table saw, mount the wall strips into studs with 2½-inch screws, and build custom holders from scrap wood for each tool.
How do I organize a one-car garage I still need to park in?
Focus on wall-mounted and ceiling-mounted storage exclusively. A fold-down workbench with drop-down legs folds flat against the wall when not in use. Overhead racks above the garage door hold storage bins without interfering with the door mechanism. Pegboard and French cleat systems keep tools vertical on the wall. Mobile carts tuck into corners and roll out when needed. Avoid any floor-standing storage in the parking zone — everything should be up, folded, or movable.
By implementing these garage organization ideas and storage solutions step by step, you’ll build a workshop that’s safer, more efficient, and actually enjoyable to work in. Start with the project that solves your biggest frustration, and build from there. Happy organizing!
