


A lot of backyards have a grill parked in the corner with nowhere to set down a plate. That setup turns every cookout into a balancing act. An outdoor kitchen changes how you use your space, but it doesn’t have to be a massive renovation.
I’m focusing on practical improvements that make cooking outside feel less like camping and more like a natural extension of your home. These 15 ideas cover layout, storage, shade, and the small details that keep a space functional all season long.
1. Create a Defined Grill Station With Landing Space
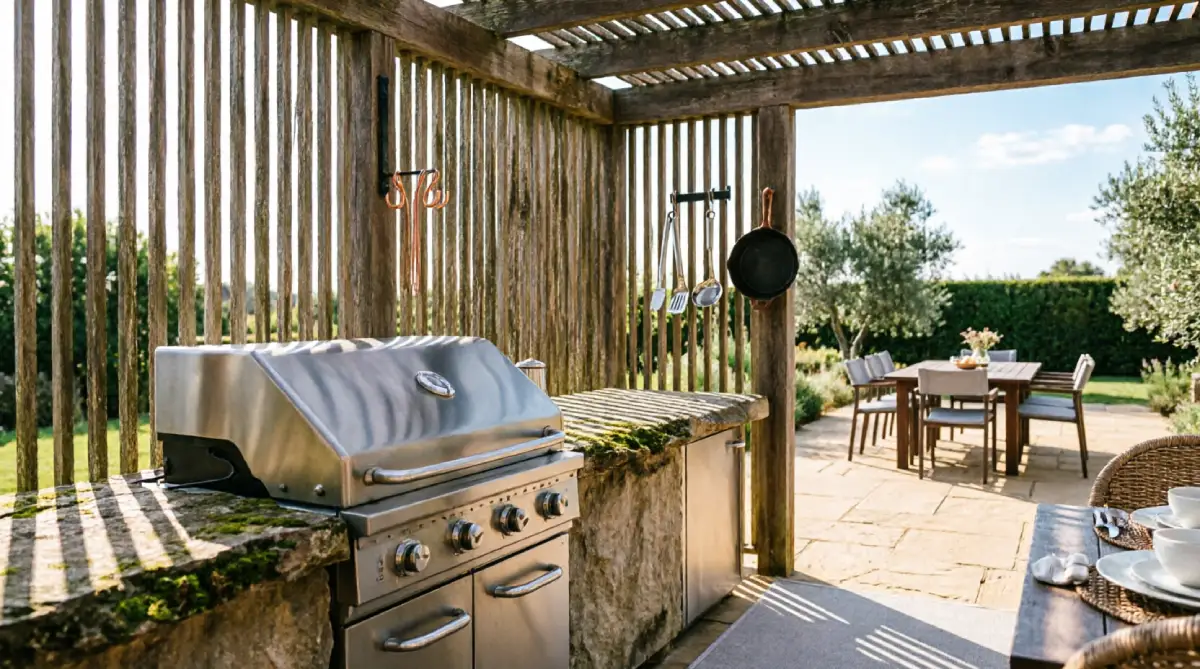
A standalone grill leaves you holding a tray of raw chicken with nowhere to put it down. The single most useful upgrade you can make is adding solid counter space on at least one side of the grill. Even a 24-inch-wide section of concrete board or weatherproof butcher block changes the entire workflow.
This idea works because it solves the biggest frustration in outdoor cooking: the lack of a staging area. When you have a flat, heat-resistant surface right next to the fire, you season, flip, and plate without running back inside. The food stays hot, the mess stays outside, and you’re not constantly wiping down a patio table.
In many homes, I see grills squeezed against a wall or railing with no room to maneuver. A common issue is that the side burner sits unused because there’s no counter nearby to hold ingredients. The grill itself becomes a cluttered mess.
I recommend building a simple L-shaped frame with concrete backer board and a tile or stone top, extending at least 18 inches on the most accessible side. If you’re renting or want something movable, a stainless steel prep cart parked right next to the grill does the same job without any permanent changes.

2. Add a Dedicated Pizza Oven Nook
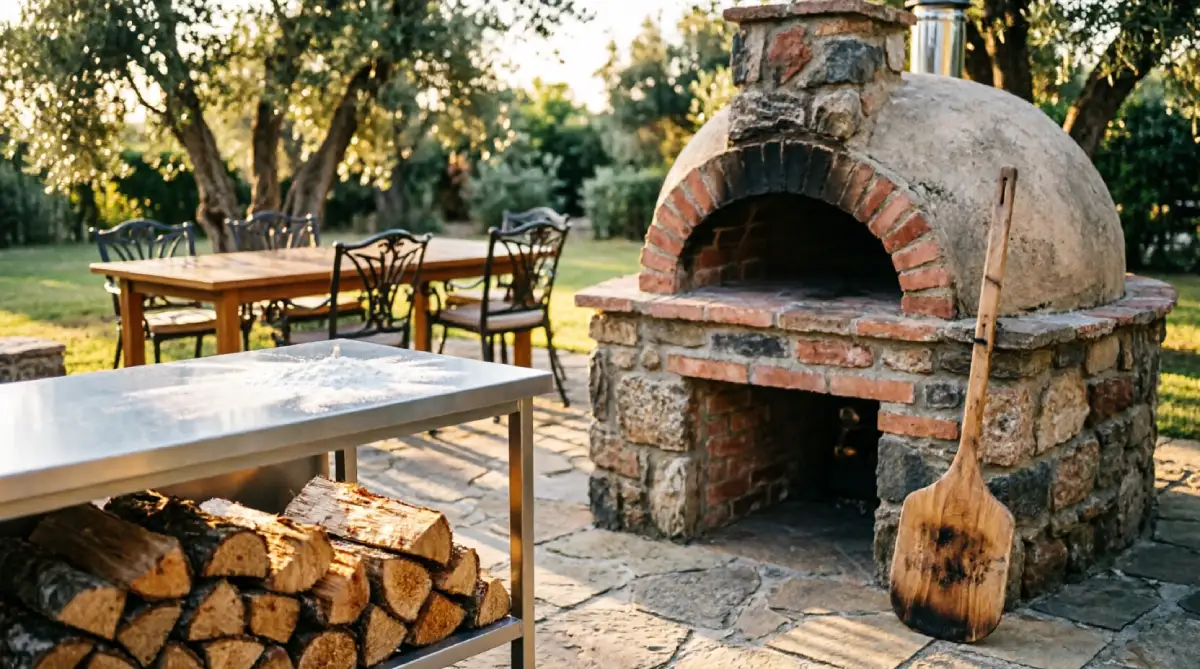
A wood-fired pizza oven turns a simple gathering into an event, but it needs a smart location. Instead of plopping it in the middle of the patio, I like seeing them tucked into a corner with a small prep ledge and a log storage cubby underneath. The heat radiates outward, so keeping it slightly away from the main seating zone makes everyone more comfortable.
The reason this setup works is that a pizza oven requires its own rhythm—stretching dough, firing quickly, pulling pizzas. When it has a defined zone, the cook doesn’t collide with guests reaching for drinks. It also contains the flour dust and ash that inevitably spread during a session.
I’ve noticed that many homeowners place the oven too close to the dining area, and within an hour guests are shifting away from the radiating warmth. A few feet of separation, or a low heat shield wall, makes a noticeable difference.
Place the oven on a sturdy, fire-rated stand about 8 to 10 feet from the main table. If you’re building from scratch, include a stainless steel counter on one side and open shelving below for peels and wood. Consider a pergola or awning above, but only if the clearance meets fire code.
3. Install an Outdoor Bar Sink
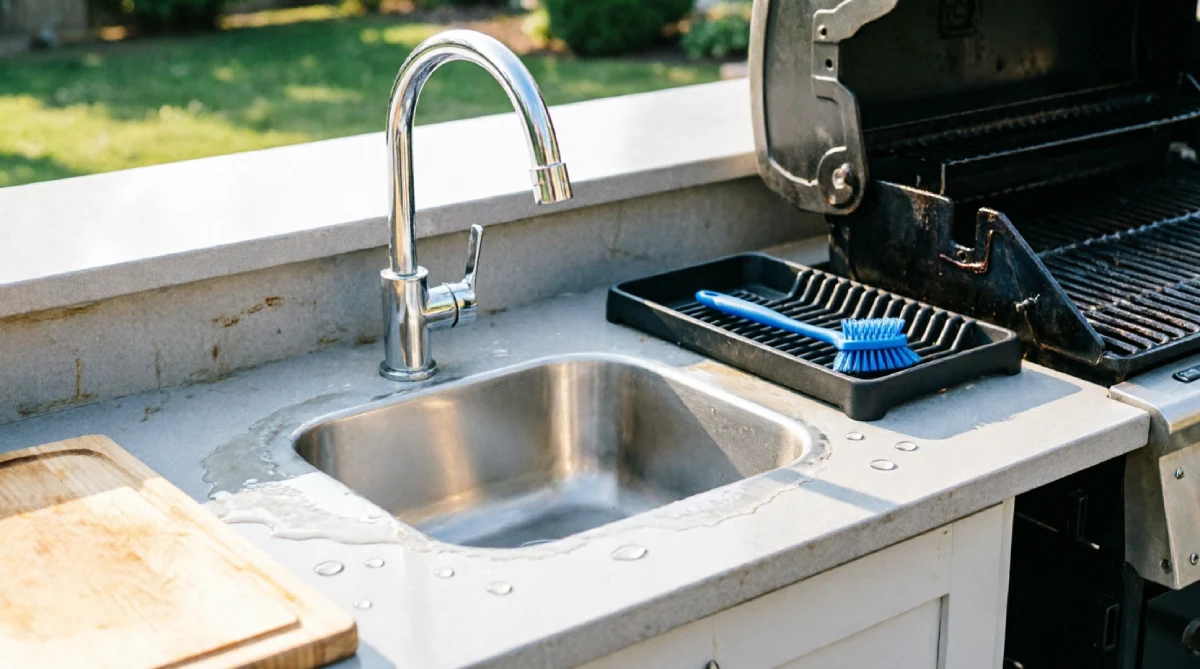
Running back inside to wash lettuce or rinse sticky hands interrupts the whole rhythm of cooking outside. An outdoor sink might sound like a luxury, but I’d argue it’s one of the highest-impact additions if you cook outside regularly. A simple drop-in basin with cold water and a drain that ties into a dry well or existing line is often enough.
The main benefit is hygiene and convenience. You’re handling raw meat, seasoning, and marinades—being able to wash your hands without touching the door handle to the house keeps things cleaner. It also saves your indoor kitchen from becoming a traffic zone during parties.
In many homes I’ve visited, the outdoor sink gets installed too low or with no counter around it, which defeats the purpose. A common issue is that the faucet is positioned so low that you can’t fit a large pot underneath.
Mount a compact bar sink into a 30-inch counter section near the grill, with a high-arc faucet. If running a permanent water line isn’t possible, a hose-connected portable sink station offers a similar function. Just make sure the drain is properly diverted away from the patio.
4. Build a Pergola for Filtered Shade
Cooking over a hot grill in direct July sun is exhausting. A pergola with a slatted roof or a retractable shade canopy over the cooking area makes a dramatic difference in comfort. It doesn’t need to cover the entire patio—just the zone where you stand while prepping and grilling.
Shade works for more than comfort. It protects your appliances from UV damage and keeps stainless steel surfaces from getting scorching hot to the touch. When your countertops aren’t baking in the sun, you can actually rest your forearms on them while chopping.
A common observation is that people install solid roofs over grills without checking ventilation. Smoke and heat get trapped underneath, turning the space into a sauna. The best setups I’ve seen use open rafters or shade sails with air gaps.
Build a pressure-treated wood pergola with a 30% to 50% shade factor, positioned to block afternoon sun over the grill and main prep counter. A retractable canvas panel gives you the option to open it on cooler days. Keep the structure at least 8 feet high to allow heat to rise.
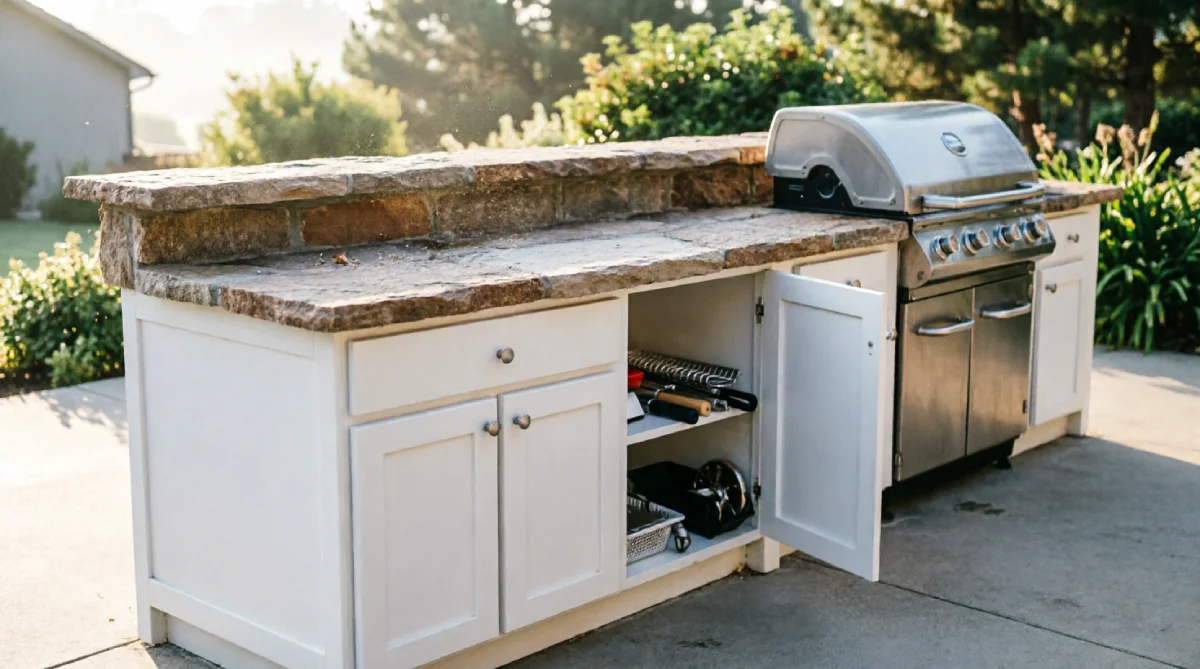
5. Choose Weatherproof Cabinetry
The first time a rainstorm soaks your particleboard outdoor cabinets, they start to swell and peel. I’ve learned that cabinetry material is one of those areas where spending a little more upfront prevents a lot of frustration later. High-density polyethylene (HDPE) marine-board cabinets, stainless steel, or even concrete block with sealed doors all hold up far better than standard kitchen cabinets.
The practical reason is simple: outdoor kitchens face temperature swings, humidity, rain, and direct sun. Materials that can’t handle moisture will warp, and painted MDF will bubble within a season. Solid, non-porous surfaces also resist mold and are easier to wipe down.
In many homes, I see good-quality grills sitting on frames wrapped in wood that’s already graying and splitting after two summers. A common issue is using indoor cabinetry outdoors with a coat of exterior paint, which never holds up for long.
I recommend HDPE marine-grade panels or powder-coated aluminum cabinets. They’re not cheap, but they won’t need replacing. For a budget-friendly alternative, consider a galvanized steel frame with removable synthetic wood panels that can be swapped out if they degrade.
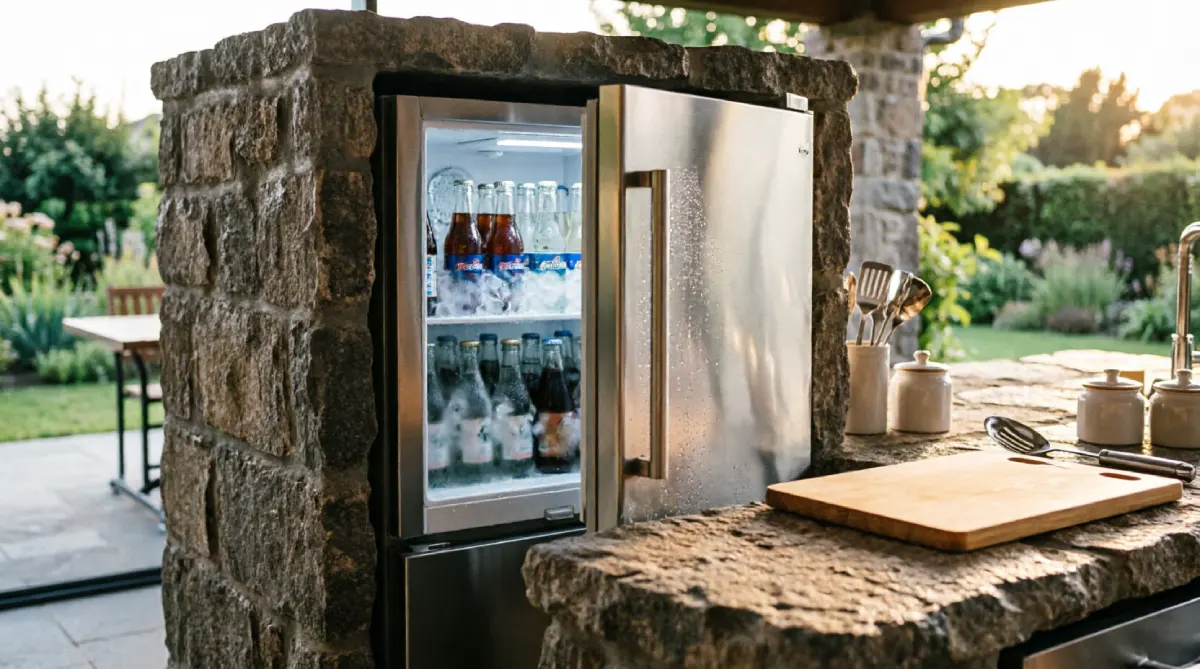
6. Integrate a Compact Outdoor Refrigerator
Constantly running inside for cold drinks, burger patties, or marinating meat breaks the momentum of outdoor entertaining. A small under-counter outdoor-rated refrigerator keeps essentials within arm’s reach. Even a compact 4.6-cubic-foot model changes how you use the space.
The benefit goes beyond convenience. Keeping raw proteins and dairy outside in a dedicated unit reduces cross-contamination in your indoor fridge and keeps the cooking flow entirely on the patio. Your indoor kitchen stays clean for other meal prep.
I’ve seen homeowners buy an indoor mini fridge and stick it outside to save money. That rarely lasts more than a season. The compressor struggles in high heat, and the exterior rusts quickly. A common issue is the seal failing on units not rated for outdoor humidity.
Invest in a stainless steel outdoor-rated compact refrigerator with a front-venting design so it can be built into cabinetry. Place it away from the direct grill heat and give it at least an inch of clearance on all sides for airflow.
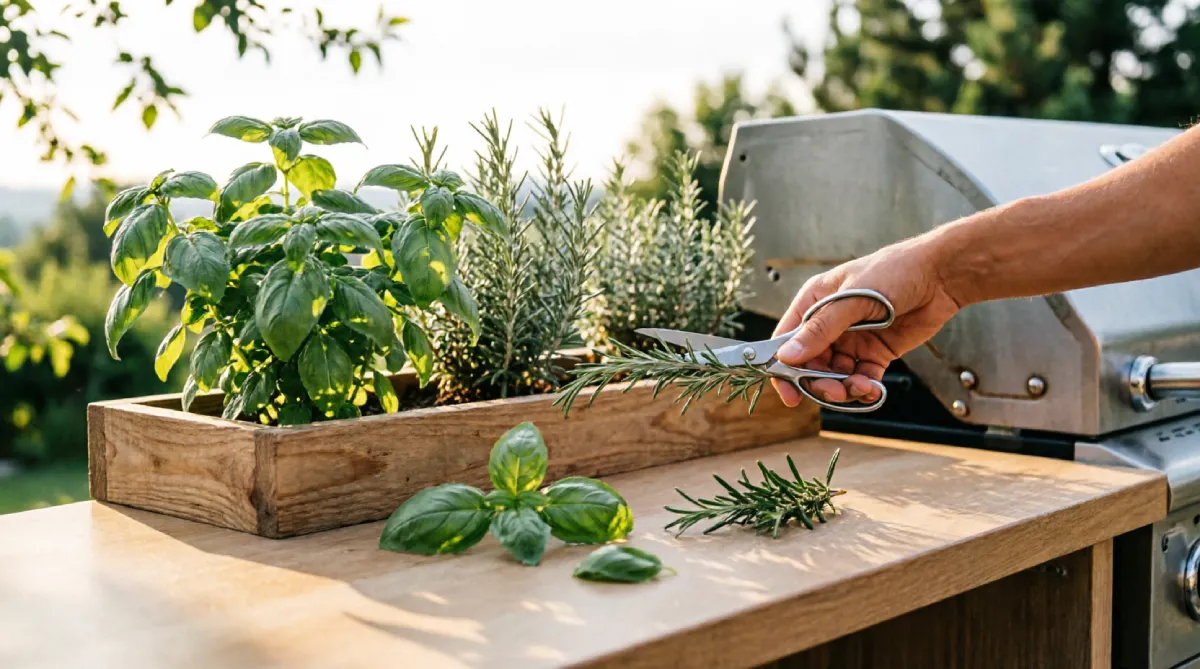
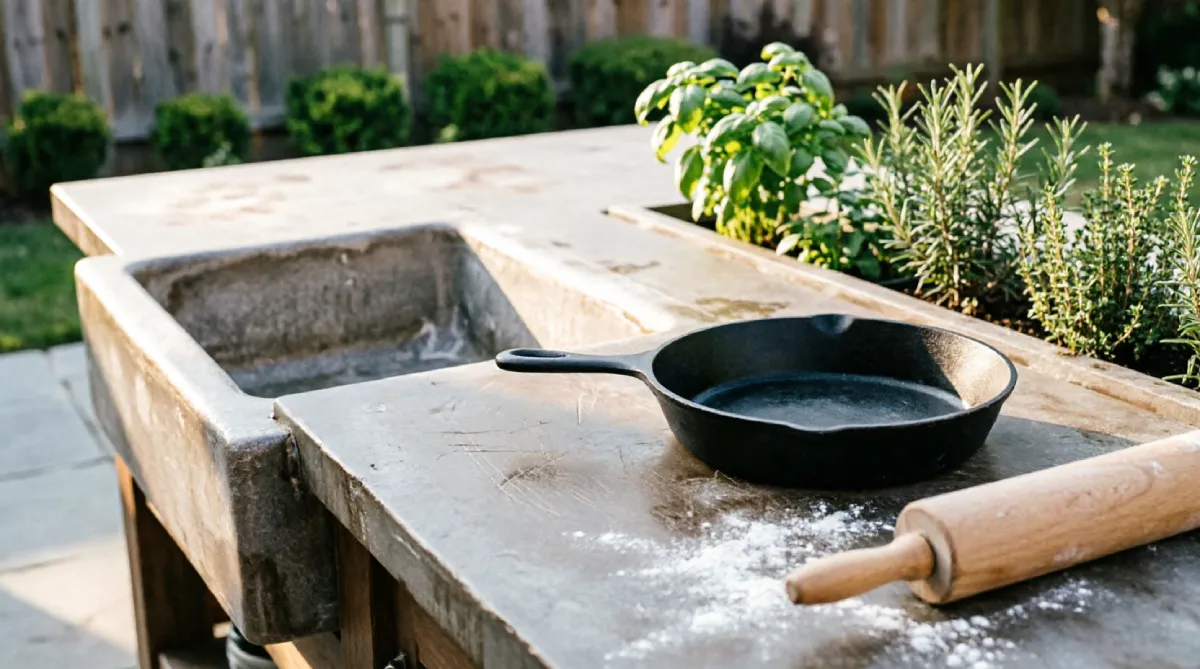
7. Plant a Small Herb Garden at Arm’s Reach
Fresh basil, rosemary, and chives snipped directly into the pan—there’s no substitute. I like seeing raised planters or vertical herb walls built into the kitchen perimeter, not just nearby. When herbs are literally within reach of the grill, you use them more often.
The practical advantage is that herbs grown in the cooking zone are used. When the garden is around the corner or down the steps, you tend to skip it when you’re in a hurry. Having mint, thyme, and oregano a few inches from the prep surface turns garnishing into an automatic step, not an errand.
A common issue I’ve observed is planting herbs directly in the ground adjacent to a grill, where grease splatter and foot traffic compact the soil. The plants struggle. In many homes, the herb bed is too far away to be useful during a busy cookout.
Use a raised planter box built into the counter at the back of the prep area, or mount a vertical pocket planter on the pergola post. Choose heat-tolerant herbs like rosemary, sage, and oregano closest to the grill, with more delicate basil and parsley a foot or two away.
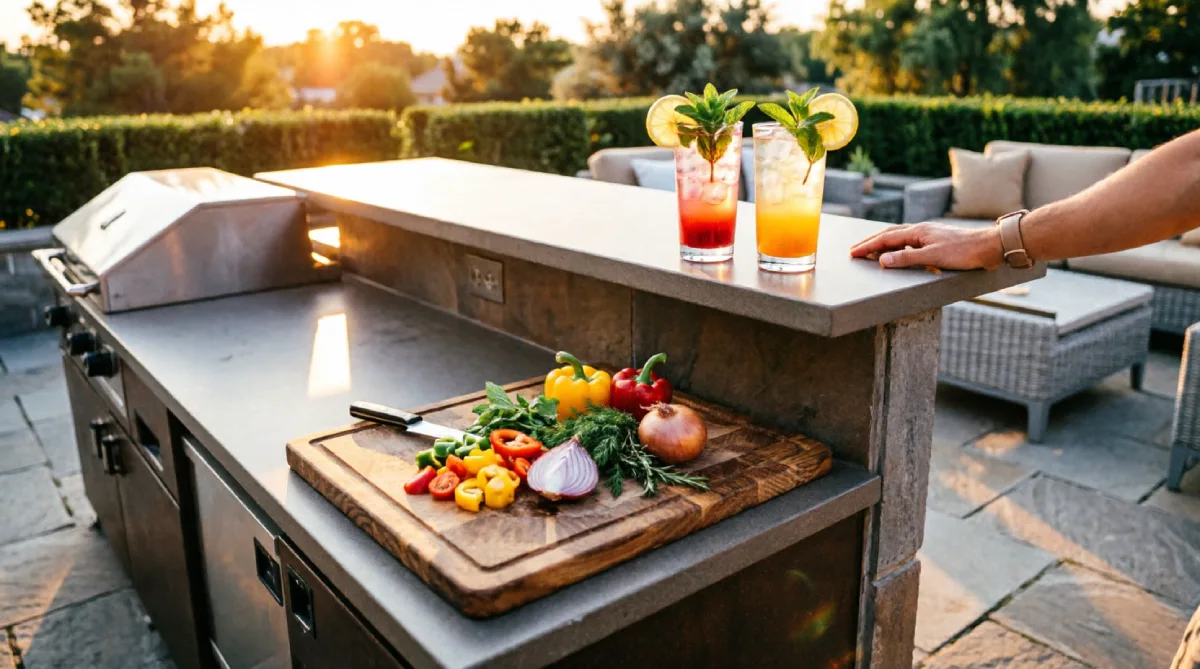
8. Design a Multi-Level Counter System
Everything on one flat surface means prep, serving, and dirty dishes all fight for the same real estate. A multi-level counter with a raised bar-height ledge creates natural zones. You can chop vegetables on the lower work surface while guests lean on the higher ledge with drinks, and the mess stays contained.
This works because it separates functions without building walls. The raised section acts as a visual and physical barrier between the cook and guests, but keeps everyone connected. It also hides prep clutter from the dining area.
I’ve noticed that single-height outdoor counters become a dumping ground for phones, keys, and half-empty cups during parties. A common issue is the cook having to clear a path before they can even set down a cutting board.
Build a two-tier island with the lower work counter at 36 inches and a raised ledge at 42 to 44 inches on the outer side. Use the upper surface for serving or as a casual bar with stools. The 6- to 8-inch difference is enough to define the zones clearly.
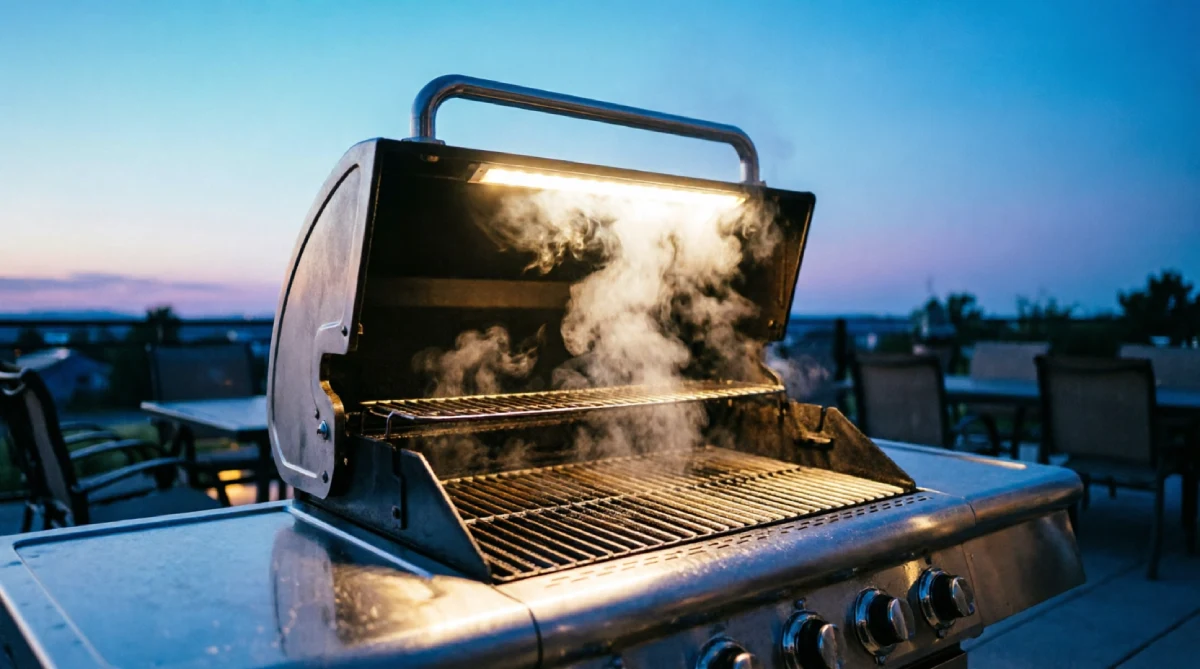
9. Hang Task Lighting for Evening Cooking
The sun sets, and suddenly you’re trying to check if the chicken is done by the glow of a tiki torch. Good task lighting over the grill and prep areas extends the usability of your outdoor kitchen by hours. It’s also a safety issue when you’re dealing with sharp knives and hot surfaces.
The reason lighting gets overlooked is that people plan their outdoor space during the day. But most summer gatherings run into the evening. Dedicated, downward-focused light lets you see the true color of the food, which matters for judging doneness. It also keeps bugs from swarming right into your cooking zone compared to open flame torches.
In many homes, I see one decorative string of patio lights over the entire area, which casts a pretty glow but leaves the grill in shadow. A common issue is mounting lights so they shine in the cook’s eyes rather than onto the work surface.
Install a dimmable LED bar or two directional spotlights under the pergola or on a nearby wall, aimed directly at the grill grates and prep counter. Choose a warm 2700K to 3000K color temperature to keep the atmosphere inviting. A separate switch lets you adjust just the task lighting.
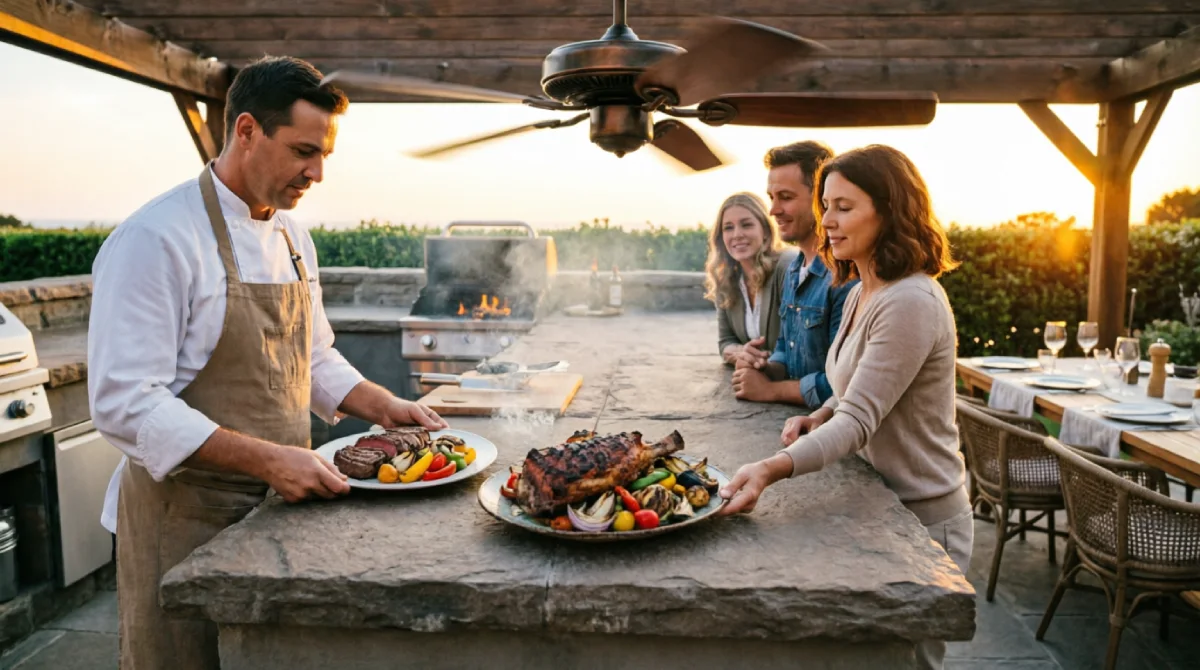
10. Add a Ceiling Fan Under the Pergola
Stagnant summer air plus grill heat makes the cooking spot feel ten degrees warmer than the rest of the yard. A damp-rated outdoor ceiling fan mounted under a pergola or pavilion roof does two things: it moves cooling air across the cook, and it helps disperse smoke so it doesn’t hang in a cloud.
The practical effect is noticeable. Even a gentle airflow makes standing in front of a 500-degree grill far more tolerable. On days with a light breeze, the fan supplements it; on still, humid evenings, it’s a game-changer. It also discourages mosquitoes from lingering in the zone.
I’ve seen fans installed too high or with blades that can’t handle moisture, leading to warping. A common issue is mounting a fan on an unbraced pergola beam that vibrates at high speed.
Choose a UL-listed damp-rated outdoor fan with a blade span appropriate for the coverage area—typically 42 to 52 inches for a cooking zone. Mount it centered over the area where you stand, about 8 feet above the floor, and ensure the pergola structure is reinforced to handle the weight and vibration.
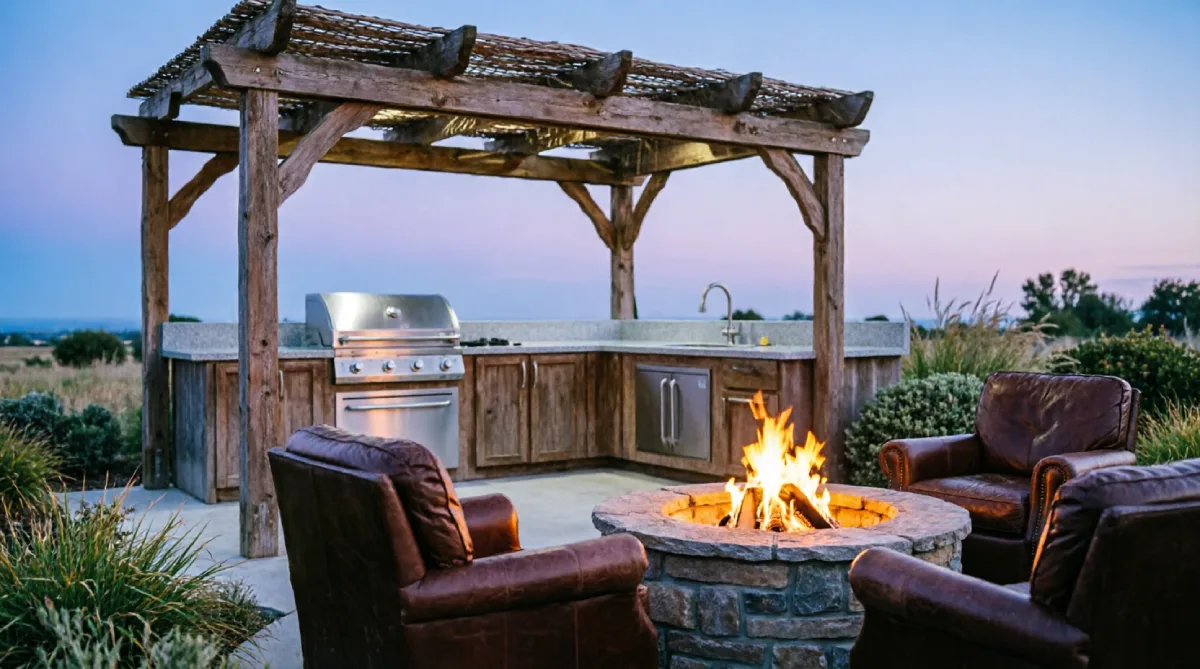
11. Build a Fire Pit Adjacent, Not Integrated
I often see fire pits placed directly next to outdoor kitchens, which sounds cozy but creates a bottleneck of heat and people. A better layout puts the fire pit 10 to 15 feet away in its own seating cluster. That way, the cook isn’t roasting from two sides, and guests naturally spread out.
This separation works because it defines two distinct gathering nodes. The kitchen zone is for active cooking and grazing; the fire pit zone is for relaxed sitting and conversation later in the evening. People don’t crowd the grill with drinks in hand, and the cook has space to work without tripping over Adirondack chairs.
In many homes, the fire pit ends up as an ash-filled obstacle next to the kitchen counter. A common issue is the wind blowing ash onto food prep surfaces.
Position the fire pit at least 12 feet from the kitchen, downwind based on your prevailing summer breeze. Use a gas fire table if you want minimal cleanup, or a traditional stone ring with a spark screen. Gravel or paver path connecting the two zones keeps the flow natural.
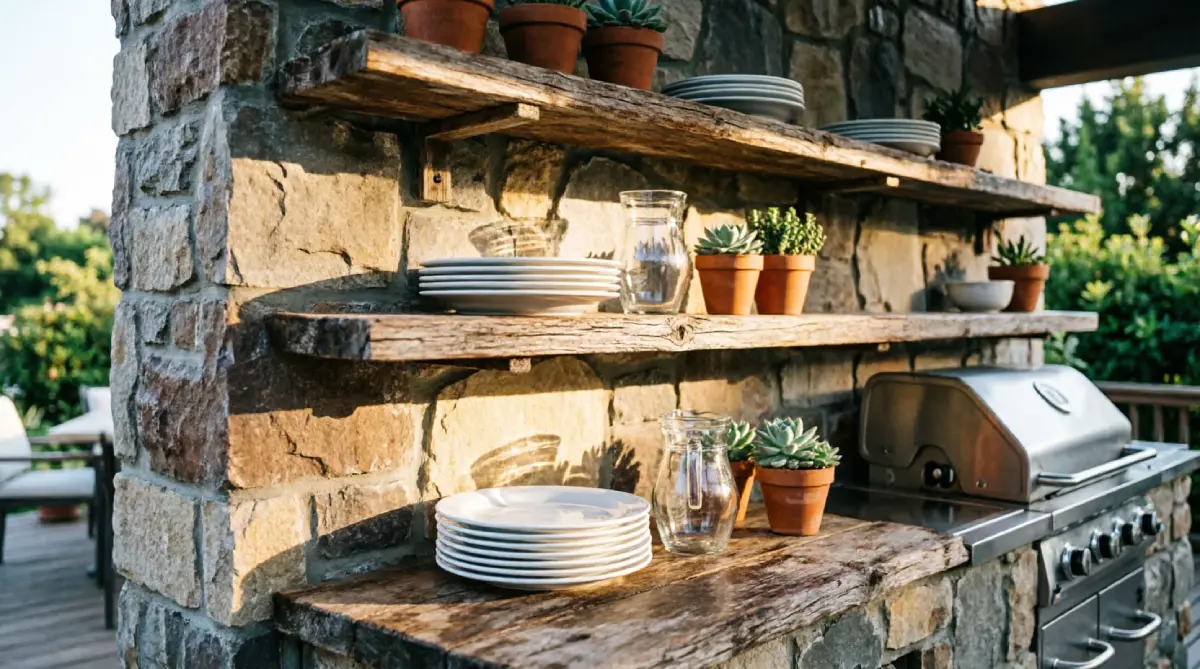
12. Use Open Shelving Instead of Upper Cabinets
Upper cabinets in an outdoor kitchen block sightlines and make the space feel closed in. I prefer open shelving made from weather-resistant materials like stainless steel, teak, or sealed cedar. It keeps frequently used items visible and accessible without trapping moisture inside doors.
The advantage is airflow. Plates, serving bowls, and spice jars stored on open shelves dry quickly after rain or humidity, whereas closed cabinets can become damp, musty boxes. Visually, open shelves keep the outdoor kitchen feeling connected to the yard rather than walled off.
I’ve seen closed upper cabinets with rusted hinges and swollen doors after just one winter. A common issue is people overloading open shelves with too much clutter, which makes the kitchen look messy instead of curated.
Install two or three open shelves at staggered heights above the prep counter. Stick to a limited collection of durable dishware, glass drink dispensers, and grilling tools in a cohesive material palette. A small lip on the front edge of each shelf prevents items from sliding off in the wind.
13. Pick a Countertop That Can Handle Real Use
Outdoor countertops take a beating: grease spatters, dropped tongs, ice buckets sweating, and direct sun all day. I recommend materials that you don’t have to baby. Granite, soapstone, concrete, and porcelain slabs all perform well, but each has trade-offs in maintenance and heat tolerance.
This matters because a countertop that stains when a tomato slice sits on it for five minutes or cracks when a hot pan touches it will drive you crazy. Outdoors, you want a surface that’s forgiving. Soapstone, for example, is non-porous and unaffected by heat, but it scratches. Granite holds up well but needs periodic sealing.
In many homes, I see tile countertops with grout lines that trap grease and become impossible to clean. A common issue is using a butcher block without enough overhang protection, leading to warping and rot.
Choose a single-slab or large-format surface to minimize seams. If you want the warm look of wood, go with a removable teak prep board on top of a stone base, not a permanent wooden counter. Darker colors get hot in direct sun, so consider lighter shades or a shaded placement.
14. Create a Dedicated Trash and Recycling Pull-Out
Trash cans sitting out in the open next to the grill attract flies and look terrible. A pull-out bin system inside a base cabinet keeps waste contained and out of sight until you need it. It’s a small detail that dramatically improves the neatness of the space.
The reason this works so well outdoors is that food waste, greasy paper towels, and empty cans pile up fast during a cookout. When the bin is integrated into the cabinetry, it’s right where you need it during prep and cleanup, but hidden when guests are eating.
I’ve seen many outdoor kitchens with no designated waste area, so people end up balancing a garbage bag on a cabinet knob or using a flimsy plastic bin that blows over. A common issue is a single large bin that mixes trash and recyclables, making post-party sorting a chore.
Install a side-by-side pull-out unit with two 13-gallon bins, one for trash and one for recycling. Use sturdy metal rails rated for outdoor use, and keep the cabinet ventilated to reduce odors. A small countertop cutout above the bin for direct sweeping of scraps is a nice extra.
15. Connect the Cooking Zone to Dining With a Pass-Through
The classic mistake is facing the grill outward so the cook has their back to everyone. A pass-through counter, where the cook works on one side, and guests sit or stand on the other, keeps the social connection alive. It turns the kitchen into a gathering spot rather than an isolated station.
This layout works because it invites interaction without crowding the prep space. The cook can hand off a plate of grilled vegetables directly across the counter to the table, and guests can chat without stepping into the hot zone. It also defines the traffic flow naturally.
In many homes, I see the grill positioned against a fence or wall, which means the cook stares at a blank surface while working. A common issue is food getting carried across uneven ground from a distant grill to the table, with the risk of trips and spills.
If building an island, orient it so the grill faces the yard and the clean counter faces the dining area. A 48-inch-wide opening or a raised bar section creates the pass-through. If space is tight, a portable prep cart on casters can serve as a temporary bridge.
Practical Tips
- Plan your work triangle: Keep the grill, sink, and fridge within a few steps of each other, just like indoors. This cuts down unnecessary movement and keeps the cook in the zone.
- Run utilities early: If you’re building a permanent structure, run a gas line for the grill and a water line for the sink before laying the patio. Retrofitting later costs significantly more.
- Test the wind pattern: Before finalizing the grill position, light some incense or a small smoke source and see where the prevailing wind pushes it. You don’t want smoke blowing directly into the seating area.
- Protect surfaces in winter: Even weatherproof materials last longer if covered. Invest in fitted covers for the grill, fridge, and any porous countertops during the off-season.
- Add a hose reel nearby: A retractable hose mounted near the kitchen makes cleaning the grill grates and rinsing the patio quick, without dragging a muddy hose across the yard.
Common Mistakes to Avoid
- Skipping ventilation: Trapping smoke and heat under a solid roof without an opening leads to an uncomfortably hot, smoky cook zone. Always allow airflow.
- Placing the grill too close to the house: Check local fire codes, but generally keep grills and pizza ovens at least 10 feet from any structure or overhang.
- Using indoor-only appliances: Standard mini fridges and cabinetry deteriorate quickly outside. Look for outdoor-rated or marine-grade products.
- Forgetting about drainage: If you install a sink, plan where the gray water goes. A bucket that you have to empty manually gets old fast.
- Overlooking night use: If you don’t install task lighting, your outdoor kitchen becomes a daytime-only feature for half the year.
Comparison Table
| Material | Best For | Why It Works | Approx. Cost per sq. ft. |
|---|---|---|---|
| Granite | High-heat areas | Natural stone resists heat and needs sealing | $40–$75 |
| Soapstone | Messy cooks | Non-porous, heat-proof, scratches blend in | $70–$100 |
| Concrete | Custom shapes | Can be poured to fit any layout, needs sealing | $50–$90 |
| Porcelain slab | Low maintenance | UV-stable, non-porous, light color options | $55–$120 |
| Tile (porcelain) | Budget-friendly | Affordable, but grout lines need care | $10–$30 |
FAQs
What is the best way to protect an outdoor kitchen in winter?
Use heavy-duty, breathable covers on all appliances and countertops. Drain water lines if you have a sink, and store portable items inside if possible. Avoid plastic tarps that trap moisture.
Can I build an outdoor kitchen under a tree?
It’s not ideal. Falling leaves, sap, and bird droppings create constant cleaning, and branches can be a fire risk near a grill. If a tree is your only shade option, keep the grill well clear and use a dedicated roof structure over the cooking area.
Is it expensive to run a gas line to an outdoor grill?
Running a natural gas line from the house typically costs a few hundred to over a thousand dollars, depending on distance and accessibility. It pays off in convenience and eliminates propane tank swaps. Get a licensed plumber to do the work.
Do I need a permit for an outdoor kitchen?
In many areas, yes, especially if you’re running electrical, gas, or plumbing lines, or building a permanent roof structure. Check with your local building department before starting any major work.
How do I keep bugs away from my outdoor kitchen?
A ceiling fan helps keep mosquitoes at bay, as they’re weak fliers. Keep food covered, use citronella plants in nearby planters, and install a screened gazebo if bugs are a constant issue in your area.
Conclusion
The best outdoor summer kitchens aren’t about having the most expensive appliances; they’re about a layout that works the way you actually cook and entertain. A defined grill station with landing space, some shade, a sink nearby, and durable surfaces that don’t need constant babying—those are the things that make you want to cook outside. Start with one or two ideas that solve your biggest frustration, whether that’s a lack of prep space or a dark cooking area at dusk. You can always add more over time. The goal is a space that feels effortless, so you spend less time running back inside and more time enjoying the meal.